A Cheap DIY Garden Path You Can Complete in a Day
Looking for a cheap DIY garden path you can complete in a day? Its possible! I mean, youre going to be sore as hell, but its doable! In the last decade of gardening, as with most things, Ive learned quite a bit. And a big learning curve for me has been hardscaping.
What is Hardscaping?
Hardscaping is simply the nonliving portion of your garden esthetic. Its not the gorgeous trees and flowers. Instead, its the patios, driveways, walkways, pathways, gazebos, pools, and so on. It can also be big planters and urns, chairs, fountains and tables. These nonliving elements play a big role our landscapes. How we use them matters!
Cheap DIY Garden Path Ideas
There are loads of different cheap DIY garden path options out there. You can mow a path with your lawnmower and call it done. Yes, thats a path. You can use mulchwood chips to designate a path. Its cheap and readily available. It breaks down which can be both good and bad, depending on your need.
My Favorite Cheap DIY Garden Path Idea
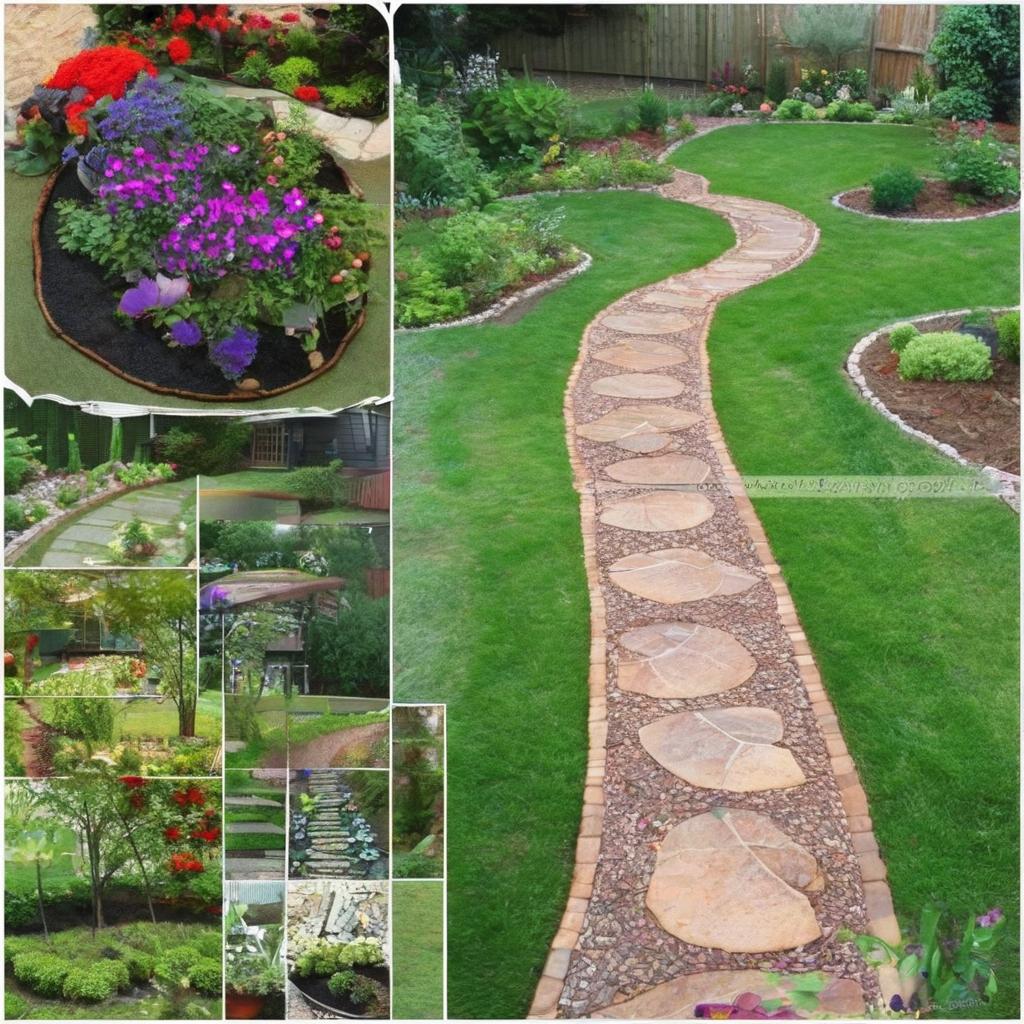
But my favorite cheap DIY garden path idea is large stepping stones with pea gravel. Its affordable about $8 per stone and $5 per bag of pea gravel and possible to lay in a day.
Pea Gravel and Stepping Stone Path
We needed a path to access our chicken run. We considered mulch as that was already around the girls playhouse. But, there was a great chance it would get muddy from constant travel with waterers being sloshed back and forth. So instead, we decided to replicate our stone patio. But where the patio uses polymeric sand which fills in small joints and makes them hard to the touch between the stones, we used pea gravel for this path.
A Quick How To
I like to lay out the big stones along where I want my path. These are heavy stones so I want to touch them as little as necessary. I look for the spots with the most foot traffic, and place the biggest stones in those spaces. For instance, the door to the run is a constant spot under our feet, as are the windows of the playhouse we play drivethru with the windows. Classy, I know!. So I knew I wanted the biggest stones at those 3 spots, as well as the first step off the grass and onto the pathway.
- After the big stones are placed, I go back and fill in the rest of the stepping stones.
- I like to walk on the stones to see how I want them turned and spaced.
- I let my kids do the same as this path is for them, too.
- Its important that our feet are stepping on the big stepping stones more than the pea gravel.
- Pea gravel gets tossed around and can be messy.
- I like to keep our feet on the stones!
Laying the Path
Once we like the general stone placement, we dig a shallow line around the perimeter of each stone. Moving one stone at a time, we dig out the ground about 2 deep below the stone, and then place the stone back. It usually takes some adjusting with dirt to get the level right. Once it feels secure, its done!
- Now there are more in depth ways of doing this.
- Like digging down and laying a crushed gravel base, then sand, then the stone.
- But, I dont feel its necessary with a garden pathway like this.
- Once a few stones are in, Ill go in and dump a bag of pea gravel and cover the dirt between the stones and spread it to the first layer of plants.
- This gives the look of the stones being a mulch.
- But, it doesnt go beyond that first layer of plants.
A Cheap DIY Garden Path That Works
Laying a path this way is simple. It is, however, backbreaking work! You dont have to do the whole path in a day, or in a weekend. Just do what works for you and your family. We have laid stone and pea gravel on both sides of the playhouse as well as around the chicken coop and run. We still have to lay the rear of the playhouse. Its just a mishmash of stones and weeds at the moment. Im pretty good with almost completing a project!
Using Stepping Stones and Pea Gravel in Your Garden
If youre looking for cheap DIY garden path ideas, I recommend considering how this would work for your project. I find pea gravel and large stones to be a great option for pathways in flower beds. They provide a rest for the eye as well as an easy way to reach deeper parts of the garden bed.
- Pea gravel and stone paths look great
- are super functional
- and dont break the bank your back a bit, but not the bank.
That’s a winning combination! I hope this gives you an idea of whether or not stepping stones and pea gravel can work in your landscape. If you have any questions, Im happy to talk gardening and garden paths!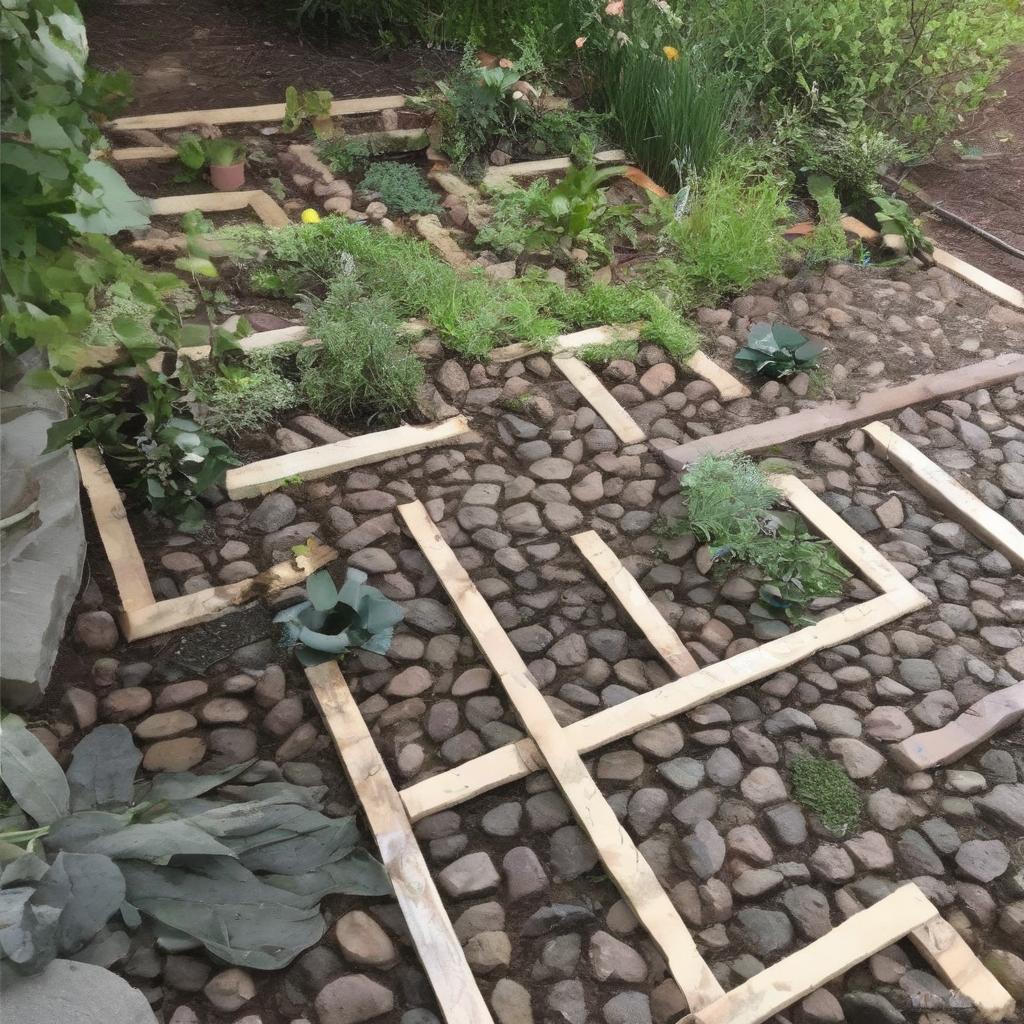 What is Hardscaping?
*_Hardscaping refers to the non-living elements of a garden, such as patios, driveways, walkways, pathways, gazebos, pools, and other features._*
What are some cheap DIY garden path ideas?
*_Some cheap DIY garden path ideas include mowing a path with a lawnmower, using mulch or wood chips, and using large stepping stones with pea gravel._*
What materials are needed for a pea gravel and stepping stone path?
*_The materials needed are large stepping stones (about $8 each) and pea gravel (about $5 per bag)._*
How do you lay out a pea gravel and stepping stone path?
*_Lay out the big stones along the desired path, placing the biggest stones in high-traffic areas. Then, fill in the rest of the stepping stones, and adjust their placement as needed._*
How deep should you dig for the stepping stones?
*_Dig about 2 inches deep below the stone, and adjust with dirt to get the level right._*
Is a crushed gravel base necessary for a garden pathway?
*_No, it’s not necessary for a simple garden pathway like this one, but it can be used for a more permanent and stable surface._*
What are the benefits of using pea gravel and stepping stones in a garden path?
*_They provide a rest for the eye, are easy to reach deeper parts of the garden bed, look great, are super functional, and don’t break the bank._*