Let’s be honest: most garages are treated like the forgotten room in the house. A dumping ground for tools, bikes, boxes of holiday decorations, and maybe even that treadmill no one uses anymore. But what if your garage could be more than just a storage zone?
Imagine walking into your garage and seeing a sleek, clean, professional-looking floor that reflects your car’s shine. No more unsightly oil stains, cracks, or that dusty, chalky concrete. Best of all? You don’t need to hire a contractor or spend thousands to make it happen.
With the right garage floor coating, a little elbow grease, and a weekend (or two), you can completely transform your garage—and boost your home’s value in the process.
In this comprehensive guide, we’ll cover:
- What garage floor coatings are
- Why they matter
- The best DIY-friendly products (ranked)
- How to choose the right one for your needs
- Step-by-step application guide
- Maintenance tips, expert hacks, and FAQs
Let’s dive in.
Part 1: Understanding Garage Floor Coatings
What Is a Garage Floor Coating?
A garage floor coating is a liquid or solid layer applied over concrete to enhance durability, protect against stains and chemicals, and improve appearance. Think of it as armor for your concrete floor—built to withstand the heavy use garages typically endure.
The most popular coatings include:
- Epoxy coatings
- Polyaspartic/polyurea coatings
- Concrete paints
- Concrete sealers
- Garage floor tiles
Each offers a different level of protection, appearance, and ease of application.
Why Should You Coat Your Garage Floor?
Here’s what a quality garage floor coating brings to the table:
✅ Protects Your Investment
Concrete may seem tough, but it’s porous and prone to damage from:
- Oil and chemical spills
- Moisture and freeze/thaw cycles
- Abrasion from tires or dropped tools
A coating adds a barrier that prevents long-term damage and costly repairs.
✅ Boosts Home Value
Buyers love clean, finished garages—especially in competitive real estate markets. A coated floor signals that the home is well-maintained.
✅ Easier Maintenance
Dusty concrete is hard to keep clean. Coated floors can be swept or mopped in minutes. No more battling stains or grimy build-up.
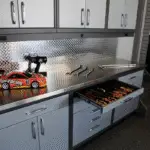
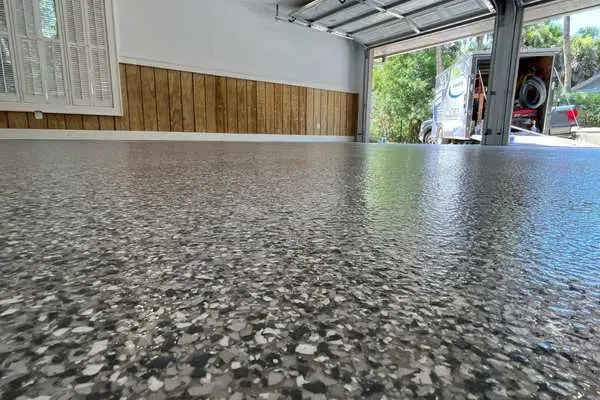
✅ Transforms the Look
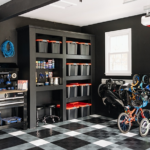
Let’s not underestimate the aesthetics. A glossy gray epoxy or checkerboard tile can make your garage feel like a high-end showroom.
What Makes a Coating “DIY-Friendly”?
Not all coatings are beginner-friendly. Look for:
- Minimal surface prep
- One-part or pre-measured systems
- Short cure times (1–3 days)
- Low VOC and low odor
- Clear instructions and online support
Now, let’s rank the best options.
Part 2: Best DIY Garage Floor Coatings (Ranked & Reviewed)
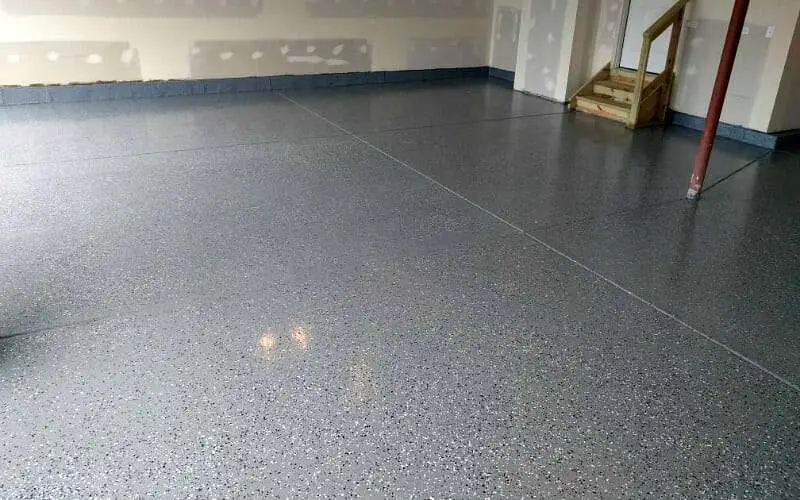
1. Epoxy Coating Kits
Overview:
Epoxy is a two-part resin that hardens into a durable, glossy finish. It’s been the go-to for decades thanks to its toughness and visual appeal.
✅ Pros:
- Long-lasting (10–20 years with proper prep)
- Oil, chemical, and abrasion-resistant
- Comes in many colors with decorative flake options
- Strong adhesion
❌ Cons:
- Surface prep is crucial (etching, cleaning, crack repair)
- Can be slippery unless textured
- Fumes during application (needs ventilation)
- Long cure time (2–5 days)
🔥 Popular DIY Epoxy Kits:
- Rust-Oleum EpoxyShield
- Quikrete Epoxy Garage Floor Kit
- ArmorPoxy Garage Floor Epoxy
🧰 Ideal For:
Homeowners who want professional-grade results and are willing to invest time in prep work.
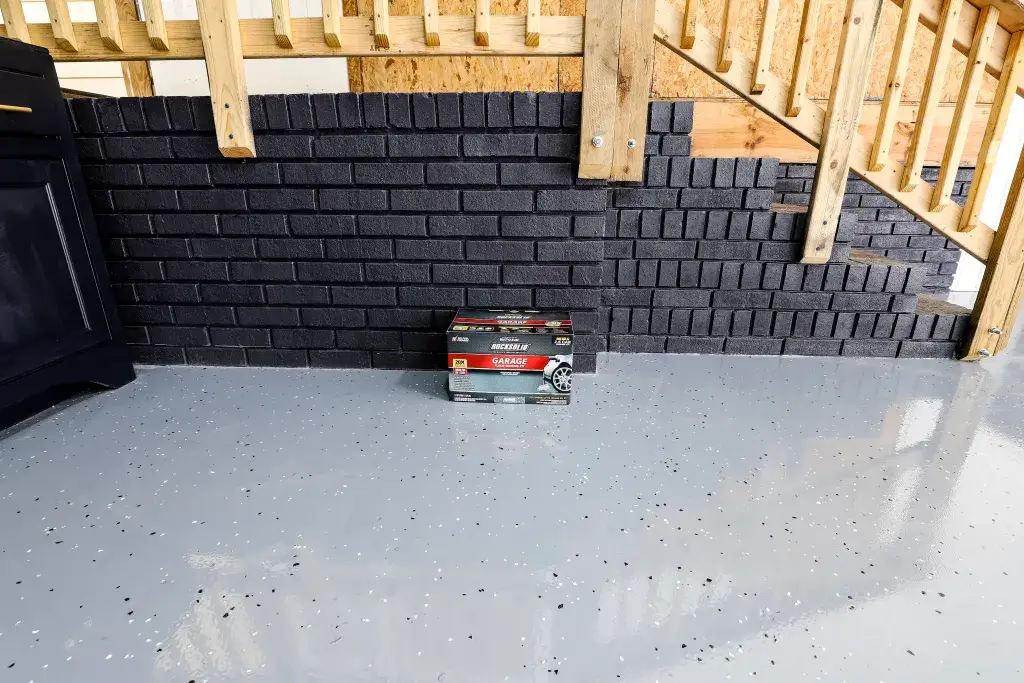
2. Polyaspartic Coatings
Overview:
Polyaspartic coatings are advanced materials that cure rapidly and outperform epoxy in some areas. They’re also UV-stable, which means they won’t yellow in sunlight.
✅ Pros:
- Cures in just a few hours (usable same day)
- UV resistant (won’t yellow or degrade)
- Flexible and impact-resistant
- Minimal odor, low VOC
❌ Cons:
- Pricey
- Not as widely available in consumer kits
- Requires quick application (fast cure)
🔥 Popular DIY Polyaspartic Products:
- RockSolid Garage Floor Coating (Rust-Oleum)
- DAICH SpreadStone or Polyaspartic Clear Coat
- Spartacote (LATICRETE)
🧰 Ideal For:
Busy DIYers looking for speed and durability, with a bigger budget.
3. Concrete Paint
Overview:
This isn’t your average wall paint—concrete paint is made for horizontal surfaces and offers decent protection at a low cost.
✅ Pros:
- Extremely easy to apply (roller + brush)
- Budget-friendly
- Ideal for low-traffic garages
- Comes in matte or gloss finishes
❌ Cons:
- Wears faster than epoxy or polyaspartic
- May peel under hot tires or heavy loads
- Reapplication needed every 1–2 years
🔥 Recommended Brands:
- Behr Premium Concrete & Garage Floor Paint
- KILZ Concrete & Garage Floor Paint
🧰 Ideal For:
DIYers seeking a cosmetic upgrade or staging for resale, without major investment.
4. Garage Floor Tiles (Interlocking)
Overview:
Not a coating, but an easy solution. Interlocking PVC or rubber tiles snap together to create a durable and stylish surface.
✅ Pros:
- Instant transformation (no drying or fumes)
- Easy to install and replace damaged tiles
- Adds insulation and anti-fatigue benefits
❌ Cons:
- Can trap moisture below
- May shift or separate over time
- Not a permanent solution
🔥 Top Tile Brands:
- RaceDeck
- GarageTrac
- Swisstrax Modular Flooring
🧰 Ideal For:
Renters or those seeking a reversible, hassle-free flooring upgrade.
5. Concrete Sealers
Overview:
Seal concrete against water, salt, and stains without altering the natural look.
✅ Pros:
- Simple spray or roll-on application
- Clear finish maintains concrete’s natural look
- Improves longevity
❌ Cons:
- No change in appearance
- Not resistant to abrasions or impact
- Reapplication every 2–3 years
🔥 Trusted Sealers:
- Foundation Armor AR350
- Ghostshield Lithi-Tek 9500
- Rainguard Micro-Seal
🧰 Ideal For:
Minimalists who want subtle protection with zero visual change.
Part 3: How to Choose the Right Floor Coating for Your Garage
1. Assess Your Goals
Ask yourself:
- Do I need cosmetic improvement or heavy-duty protection?
- Will I use the garage as a workshop, gym, or storage?
- Am I okay with minor prep or ready for a full weekend project?
2. Consider the Climate
- Cold climates: Avoid paints that peel with freeze/thaw cycles.
- Humid climates: Use vapor barrier coatings to avoid bubbling.
- Sunlight exposure: Go for UV-resistant polyaspartic options.
3. Inspect the Concrete
- Cracked or pitted floors? Use filler or patch before coating.
- Moisture issues? Tape down plastic and check for condensation.
- Old sealer or paint? You’ll need to grind or strip it before reapplication.
4. Budget Breakdown
| Budget Level | Options |
|---|---|
| $ (Under $100) | Concrete paint, basic sealers |
| $$ ($100–300) | Epoxy kits, floor tiles |
| $$$ ($300+) | Polyaspartic kits, premium epoxy |
Part 4: How to Apply Garage Floor Coatings Like a Pro
Let’s walk through a typical epoxy or concrete paint application process.
🔧 Tools & Materials Needed:
- Power washer or floor cleaner
- Concrete etching solution (if required)
- Degreaser
- Crack filler / patching compound
- Epoxy or paint kit
- Paint rollers, brushes, trays
- Painter’s tape
- Protective gear (gloves, goggles, mask)
- Optional: decorative flakes, anti-slip additive
🧽 Prep the Floor (Most Important Step!)
- Clear and Clean:
- Move everything out
- Sweep and vacuum all debris
- Use degreaser on any oil spots
- Etch the Concrete:
- Use an etching solution to open the surface pores
- Rinse thoroughly and allow to dry
- Repair Cracks:
- Fill with epoxy filler or patching compound
- Sand smooth after curing
- Dry Completely:
- Wait at least 24–48 hours if you’ve washed or etched the floor
🎨 Apply the Coating
- Mix Carefully:
- For epoxy, combine the two parts and mix for 2–3 minutes
- Cut in the Edges:
- Use a brush to outline corners and along the walls
- Roll in Sections:
- Use a 3/8″ nap roller and work in small sections
- Maintain a wet edge to avoid roller lines
- Add Flakes (Optional):
- While wet, sprinkle decorative flakes for texture and design
⏳ Let It Cure
- Most epoxies take 24–48 hours before foot traffic and 72+ hours before vehicles
- Polyaspartic coatings can cure in just a few hours
- Avoid dragging heavy items until fully cured
Garage Floor Maintenance, Troubleshooting & Expert Tips
Once you’ve transformed your garage floor with a fresh coating, the last thing you want is for it to chip, peel, or look worn out too soon. Good news: with the right maintenance strategy and some practical know-how, you can make your DIY coating last for years—even decades.
🧼 Routine Maintenance Tips
1. Regular Cleaning
- Dust and sweep weekly to prevent dirt from scratching the surface.
- Use a soft-bristle broom or microfiber dust mop for the best results.
- Vacuum with a soft floor attachment for deeper cleaning.
2. Mop Monthly
- Mop using a mixture of warm water and a pH-neutral cleaner.
- Avoid harsh cleaners like bleach or ammonia—these can degrade the finish.
3. Wipe Up Spills Quickly
- Oil, antifreeze, and gas can damage coatings over time.
- Wipe spills immediately with a microfiber towel or shop rag.
4. Avoid Dragging Heavy Objects
- Use furniture sliders or cardboard under equipment or tool chests.
- This prevents gouges or scratches, especially on paint or epoxy.
🧰 Troubleshooting Common Issues
Even well-applied coatings can run into issues. Here’s how to fix them:
Problem: Peeling or Flaking
Cause: Poor surface prep or moisture under the coating.
Fix:
- Grind or sand off peeling areas.
- Reseal or recoat the section after proper prep.
Prevention Tip: Always perform a moisture test before coating—tape plastic to the floor for 24 hours and check for condensation.
Problem: Hot Tire Pickup
Cause: Tires heat up during driving and soften low-grade coatings.
Fix:
- Recoat with a high-quality epoxy or polyaspartic.
- Use a primer designed for hot tire resistance.
Prevention Tip: Allow full cure time (usually 72+ hours) before parking vehicles.
Problem: Bubbling or Blistering
Cause: Trapped air or moisture during application.
Fix:
- Sand the surface and reapply in thin coats.
- Improve ventilation and floor dryness next time.
Part 6: Expert Tips to Nail Your Garage Floor Coating
✅ Tip #1: Don’t Skip the Etch or Grind
Even premium coatings will fail if the concrete isn’t porous enough to grip. Use a muriatic acid solution, eco-friendly etch, or a diamond grinder to prep the floor thoroughly.
✅ Tip #2: Apply in the Right Temperature Range
Check your product label, but most coatings require:
- 50°F–85°F (10°C–30°C) ambient and surface temperature
- Low humidity
- No rain (if garage is open)
Too cold or humid? You risk improper curing or hazing.
✅ Tip #3: Add Anti-Slip Grit
Glossy floors look great but can be slick. Use:
- Decorative color flakes
- Aluminum oxide additive
- Silica sand
Mix these into your top coat or broadcast while wet.
✅ Tip #4: Choose the Right Gloss Level
- Glossy finishes: More reflective and stylish, but show dirt easily.
- Satin/matte finishes: Easier to maintain and less slippery.
✅ Tip #5: Use a Clear Top Coat
A clear polyurea or urethane topcoat adds:
- UV resistance
- Extra durability
- Better stain protection
Even if your base coat is solid, a clear topcoat is like the armor over the armor.
Part 7: Frequently Asked Questions (FAQs)
🧩 Q1: Can I apply a coating over old paint or sealant?
A: No. You must strip or grind off previous coatings for the new one to bond. Failing to do this can cause bubbling, peeling, or flaking.
🧩 Q2: How long does a DIY garage floor coating last?
- Epoxy: 5–15 years depending on prep and traffic
- Polyaspartic: 10–20 years
- Paint: 1–3 years
- Sealer: 2–5 years
- Tiles: 5–10 years with care
🧩 Q3: Is there a one-day garage floor coating?
A: Yes—polyaspartic kits cure in a single day and can often handle light traffic within hours. They’re great for weekend warriors who want fast results.
🧩 Q4: What’s the best coating for a home gym garage?
A: Consider rubber interlocking tiles or polyaspartic with anti-slip grit. These provide shock absorption, durability, and easy cleanup.
🧩 Q5: Will DIY floor coatings increase home value?
A: Yes. A clean, finished garage with a professional-looking floor adds curb appeal, functionality, and resale value—especially in suburban or luxury home markets.
Final Thoughts: Ready to DIY Your Dream Garage?
Transforming your garage floor might feel like a big task—but the payoff is huge. Whether you’re upgrading for style, protection, or resale, the right floor coating can change the entire feel of your space.
From high-gloss epoxy to quick-curing polyaspartics and easy concrete paints, there’s a solution for every skill level and budget.
No more dust. No more stains. Just a beautiful, easy-to-maintain floor.
Now that you’re equipped with everything you need—from product rankings to pro tips—it’s time to roll up your sleeves and give your garage the love it deserves.
🛠 Recommended Products Recap:
| Type | Best For | Brands |
|---|---|---|
| Epoxy | Longevity + showroom finish | Rust-Oleum, Quikrete, ArmorPoxy |
| Polyaspartic | Fast cure + UV resistance | RockSolid, Spartacote |
| Paint | Budget upgrades | Behr, KILZ |
| Tiles | Temporary installs | RaceDeck, GarageTrac |
| Sealers | Clear protection | Foundation Armor, Ghostshield |
If you enjoyed this guide, don’t forget to:
- Bookmark it for your weekend DIY
- Share it on Pinterest or Facebook
- Leave a comment with your garage floor success story