Let’s be honest for a second…
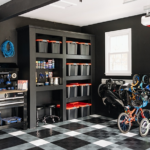
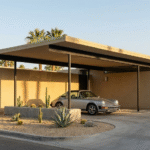
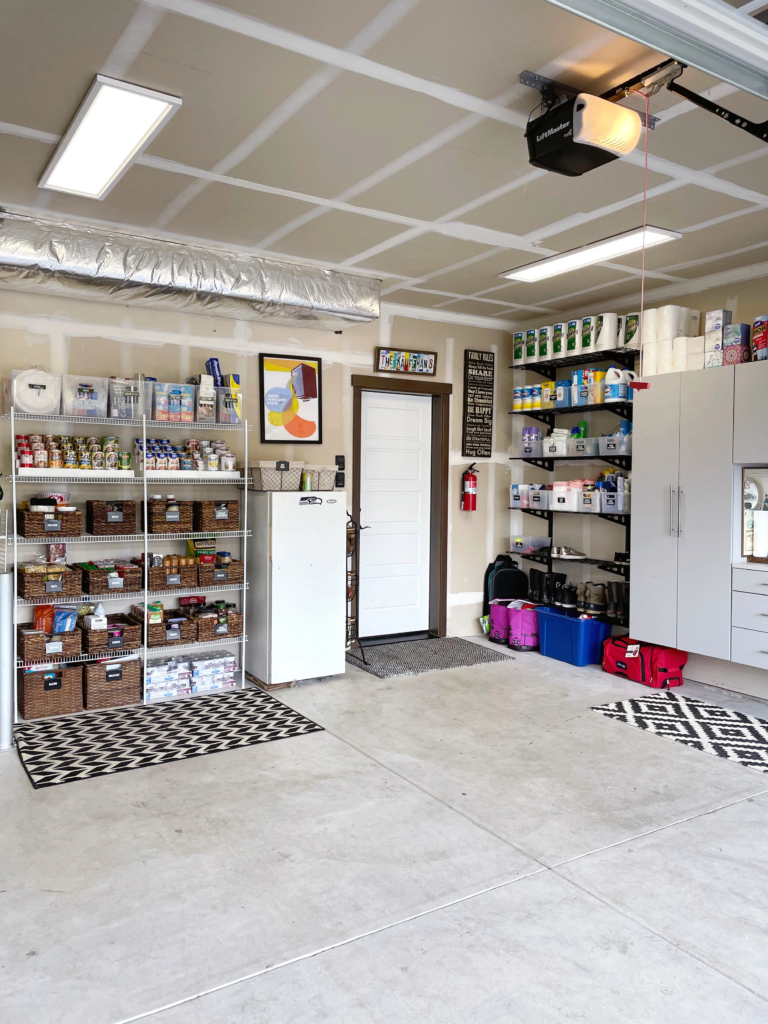
Most garages don’t look like those clean Pinterest garages with shiny floors, matching bins, and perfect shelves.
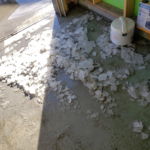
Most garages look like this:
- Random boxes stacked everywhere
- Old paint cans from 5 years ago
- Broken chairs you “might fix someday”
- Holiday decorations buried under everything
- Tools scattered across the floor
- And a mystery pile in the corner that nobody wants to touch
And the worst part?
You walk into your garage, get overwhelmed, and immediately decide:
“Nope… I’ll do it later.”
Sound familiar?
Good news: you can actually organize your garage in ONE weekend — without losing your mind.
You don’t need a fancy remodel. You don’t need custom cabinets.
You just need a plan.
In this step-by-step guide, I’ll walk you through exactly how to organize your garage in a weekend, including what to buy, what to toss, how to set up zones, and how to keep it organized long-term.
Let’s turn your garage from chaotic storage room into a functional, clean, stress-free space.
Why Organizing Your Garage Feels So Hard
Before we jump in, let’s talk about why garages become disasters in the first place.
Garages are basically the “junk drawer” of the entire house.
Everything that doesn’t have a home ends up in the garage:
- sports gear
- gardening tools
- cleaning supplies
- old furniture
- extra kitchen stuff
- seasonal decorations
- random hardware and screws
- kids’ bikes and scooters
So over time, the garage becomes a dumping ground.
The key to fixing it is not motivation.
The key is structure.
Once you create zones and storage systems, the garage stays clean with way less effort.
What You’ll Need Before You Start (Quick Shopping List)
Before your weekend begins, it helps to gather supplies.
You don’t have to buy everything, but having a few key items will make the process faster.
Basic Garage Organizing Supplies
- Heavy-duty trash bags
- Cardboard boxes (for sorting)
- Clear storage bins with lids
- Labels or label maker
- Permanent marker
- Broom, vacuum, and cleaning spray
- Gloves and mask (trust me)
- Shelf liner (optional but nice)
Optional (But Game-Changing) Storage Upgrades
- Wall hooks for bikes and tools
- Pegboard tool organizer
- Metal shelving racks
- Overhead storage rack
- Rolling storage cart
- Plastic drawer units for small items
You can get most of these from Amazon, Home Depot, or even IKEA.
The Weekend Garage Organization Plan (2-Day Breakdown)
Here’s the simple weekend plan:
Saturday = Declutter + Sort + Clean
Sunday = Install Storage + Organize + Label
This is the exact formula that works.
Because if you try to organize without decluttering first… you’re just rearranging clutter.
STEP-BY-STEP: How to Organize Your Garage in One Weekend
Let’s do it properly.
Step 1: Set a Clear Goal (Before You Touch Anything)
Before you start pulling boxes out, ask yourself:
What do I want my garage to be used for?
Some people want:
- parking space for cars
- a home gym
- a workshop
- clean storage
- a family “mudroom” entry area
Your goal matters because it affects the layout.
Quick Tip:
If you want to park your car inside again, your goal should be:
“Clear the center floor space.”
That one goal will guide every decision.
Step 2: Take Everything Out (Yes, Everything)
This step is annoying but necessary.
Pull everything out of your garage and move it into your driveway or yard.
If you can’t remove everything, then at least clear one half at a time.
Why this matters:
You need to see your garage empty to understand:
- how much space you really have
- what you’ve been storing unnecessarily
- where the clutter is coming from
Plus, once the garage is empty, you’ll feel a weird kind of motivation like:
“Okay… now I HAVE to make it nice.”
Step 3: Sweep and Deep Clean the Garage
Now that your garage is empty, it’s time for a quick clean.
Do this before putting anything back in.
What to do:
- Sweep all dust and dirt
- Remove spider webs from corners
- Wipe down shelves
- Clean oil stains (optional)
- Spray for bugs if needed
This step instantly makes the garage feel “new” again.
And honestly, a clean floor makes you less likely to dump random stuff later.
Step 4: Create Sorting Categories (The 5-Pile Method)
Now comes the real organizing magic.
Instead of staring at the clutter and feeling overwhelmed, use the 5-pile method.
Create these piles:
1. Keep
Items you use regularly.
2. Donate
Items that are still good but you don’t need.
3. Trash
Broken, expired, useless items.
4. Sell
Items worth money (tools, furniture, bikes, equipment).
5. Relocate
Items that don’t belong in the garage (kitchen stuff, clothes, kids toys, papers).
This method makes decision-making fast and simple.
Step 5: Declutter Hard (And Be Brutally Honest)
This is the step where your garage transformation happens.
Here’s the truth:
Most garages are cluttered because people keep “maybe someday” items.
If you haven’t used it in 12 months, ask yourself:
- Would I buy this again today?
- If this disappeared, would I care?
- Am I keeping this out of guilt?
- Is it broken and realistically never getting fixed?
If the answer is yes… it’s time to let it go.
Things You Should Almost Always Toss:
- old paint cans (especially dried ones)
- broken tools
- rusted nails/screws
- old cardboard boxes
- expired chemicals
- random wood scraps you’ll never use
- torn sports gear
- mystery cables and chargers
Decluttering feels painful for the first 10 minutes.
Then it feels amazing.
Step 6: Sort Your “Keep” Items Into Garage Zones
This is where you start organizing like a pro.
Instead of organizing by “where it fits,” organize by category.
Most Effective Garage Zones
Here are the zones most garages need:
✅ Tools + hardware
✅ Gardening + outdoor equipment
✅ Sports gear
✅ Holiday decorations
✅ Car supplies (oil, washer fluid, tire pump, etc.)
✅ Cleaning supplies
✅ Recycling and trash
✅ Storage (rarely used household items)
✅ Kids outdoor toys (scooters, chalk, balls)
Once you create zones, everything becomes easier.
Because you’ll know exactly where something belongs.
Step 7: Plan Your Layout (Before Putting Things Back)
Now step back and look at your garage like it’s a blank room.
Here’s the best rule:
Store frequently used items near the entrance.
Store rarely used items higher up or deeper inside.
For example:
- daily tools = easy reach
- gardening gear = near garage door
- holiday decor = overhead or top shelves
- paint cans = back corner (in safe storage)
This one strategy will make your garage feel 10x more functional.
Sunday: Storage Setup and Organizing Day
Now that everything is decluttered and sorted, Sunday is where your garage starts looking like a Pinterest transformation.

Step 8: Install Shelving (The #1 Garage Upgrade)
If your garage doesn’t have shelving, clutter is guaranteed.
Shelves create vertical storage, which is the secret to a clean garage.
Best shelving options:
- heavy-duty metal racks
- wall-mounted shelves
- plastic shelving units (cheap but not as strong)
Pro Tip:
Avoid storing items directly on the floor.
If something touches the floor, it becomes part of the mess.
Step 9: Use Clear Storage Bins (And Ditch Cardboard)
Cardboard boxes are the enemy of a clean garage.
They:
- attract bugs
- break down over time
- look messy
- make it hard to find anything
Instead, use clear plastic bins.
Best bin strategy:
- use same-size bins for stacking
- keep holiday items in one bin category
- label every bin clearly
Once you start using bins, your garage instantly looks organized.
Step 10: Label Everything (Yes, Everything)
Even if you think you’ll remember what’s inside a bin…
You won’t.
Labeling prevents your garage from becoming chaotic again.
Best labels to use:
- large black text
- waterproof labels
- printed labels (looks cleaner)
Label examples:
- “Christmas Lights”
- “Camping Gear”
- “Paint Supplies”
- “Car Tools”
- “Garden Tools”
This is one of the simplest steps that gives the biggest impact.

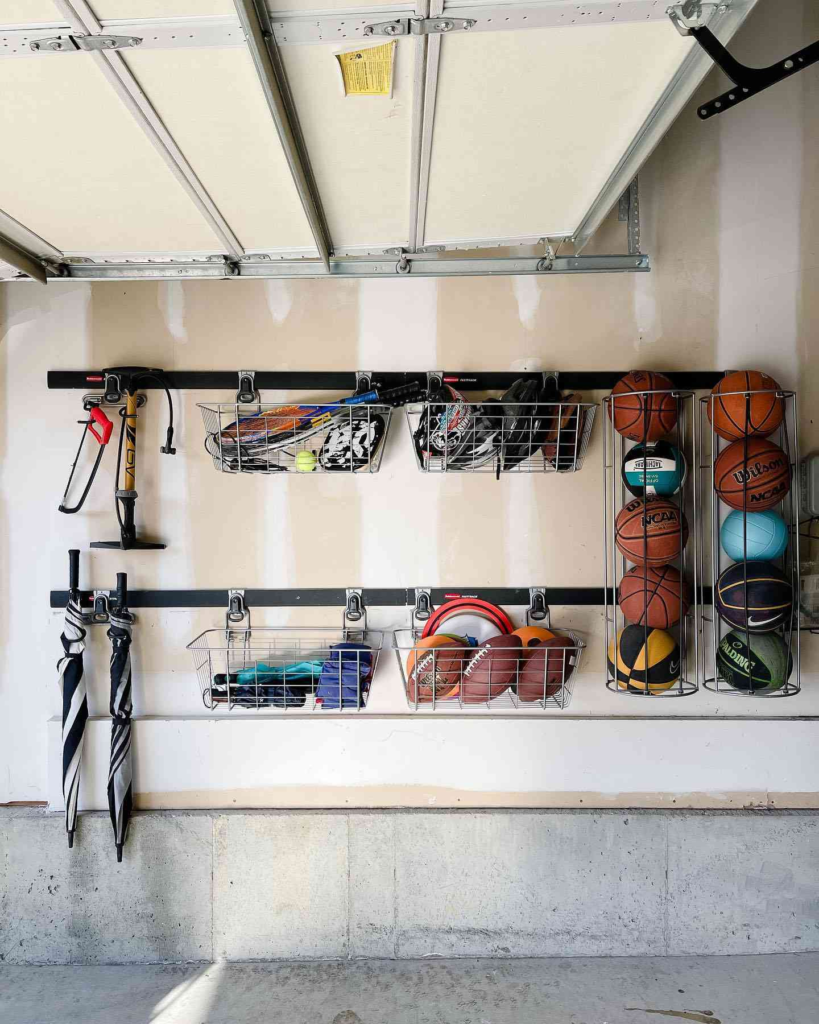
Step 11: Use Wall Storage to Free Up Floor Space
Want your garage to look bigger instantly?
Get stuff off the floor.
Best wall storage ideas:
- hooks for bikes
- wall-mounted racks for ladders
- pegboards for tools
- wall baskets for sports balls
- hanging organizers for cords
If you do nothing else, install wall hooks.
They’re cheap, fast, and they completely change the space.
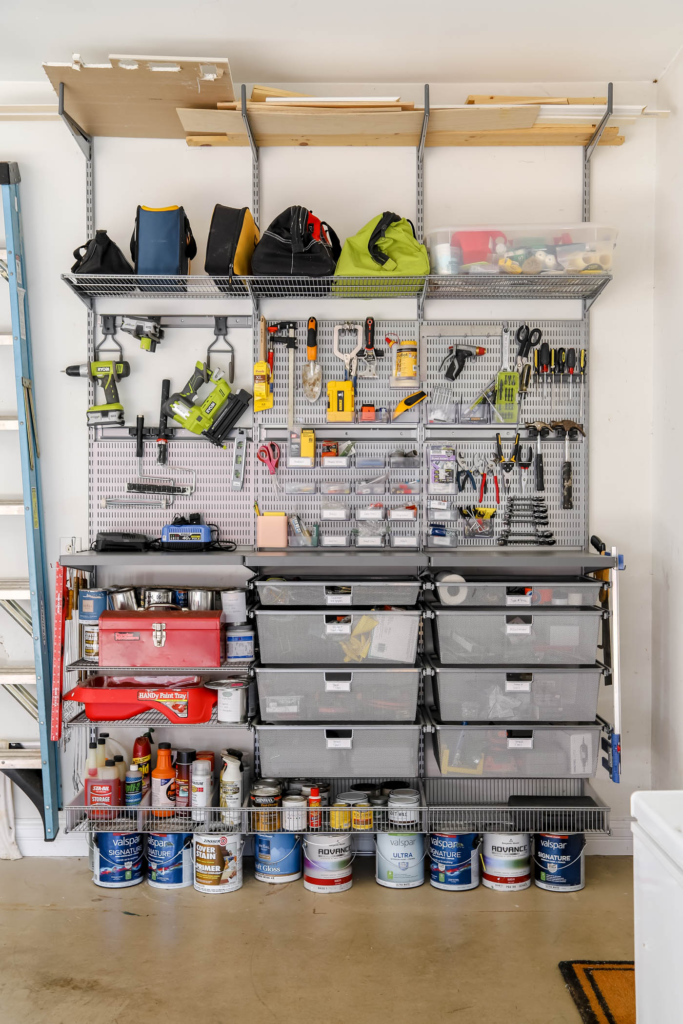
Step 12: Create a Tool Zone (Your Future Self Will Thank You)
If tools are scattered everywhere, your garage will always feel messy.
The best solution is a dedicated tool zone.
Tool Zone Setup Ideas:
- pegboard with hooks
- tool chest
- labeled drawer organizers
- magnetic strips for screwdrivers
- small bins for nails and screws
Pro Tip:
Keep your most-used tools at eye level.
This makes the garage feel like a real workshop, not a storage dump.

Step 13: Set Up a “Drop Zone” Near the Garage Door
This is one of the most underrated garage organization ideas.
If your family uses the garage entry door, create a mini mudroom space.
Drop Zone Ideas:
- shoe rack
- hooks for jackets and bags
- basket for umbrellas
- bin for sports items
This keeps clutter from spreading into the house.
And it makes your garage feel like a functional part of your home.
Step 14: Organize Seasonal Items the Smart Way
Holiday decorations and seasonal items take up tons of space.
Here’s the trick:
Store them high and group them by season.
Example:
- Christmas = red bins
- Halloween = orange bins
- Summer gear = blue bins
You don’t have to use colored bins, but it makes life easier.
Also, keep a simple rule:
If you only use it once a year, it goes on the top shelf or overhead storage.
Step 15: Use Overhead Storage for Maximum Space
If you want your garage to look truly professional and clean, overhead storage is the secret.
Overhead storage racks are perfect for:
- holiday bins
- camping equipment
- extra chairs
- luggage
- bulky storage items
This clears your walls and floors, and suddenly your garage feels twice as big.

Step 16: Set Up a Recycling + Trash Station
Most garages look messy because trash and recycling are always floating around.
Create a clear system.
Easy setup:
- 2 labeled bins (trash + recycling)
- a corner spot near the door
- a shelf above it for bags or cleaning supplies
This prevents random clutter piles from forming.
Step 17: Put Everything Back (Zone by Zone)
Now comes the satisfying part.
Start bringing your “keep” items back inside.
But don’t just throw them anywhere.
Put them back in this order:
- Large items (bikes, lawn mower, shelves)
- Storage bins
- Tools
- Sports gear
- Small items
Stick to your zones.
Pro Tip:
Don’t aim for perfection.
Aim for a system that’s easy to maintain.
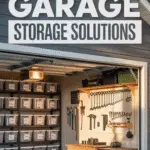
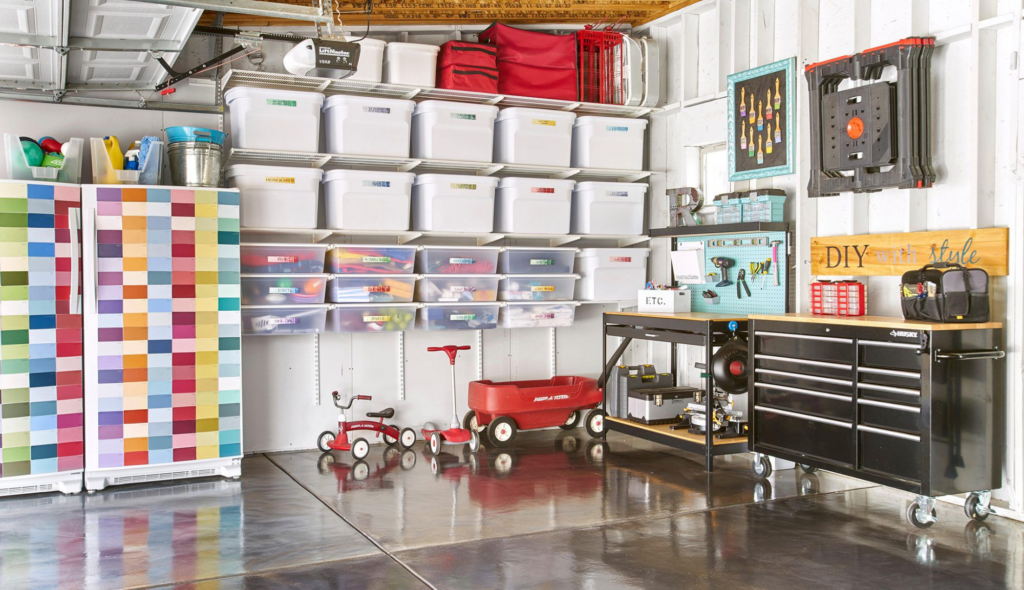
Step 18: Make Your Garage Look “Pinterest Clean”
Want it to feel like a transformation?
Here are small upgrades that make a HUGE difference:
Quick Garage Glow-Up Ideas:
- install brighter LED lighting
- paint the walls a light neutral color
- use matching bins
- add a cheap rubber mat or floor tiles
- hang a simple sign or wall clock
- keep the floor clear
Even if you don’t renovate, these details make the space feel clean and modern.
Step 19: Do a Final Walkthrough Test
Before you celebrate, do this quick test:
Ask yourself:
- Can I easily reach my tools?
- Can I access holiday bins without moving 10 things?
- Can I park my car if I need to?
- Is the floor mostly clear?
- Does every item have a “home”?
If yes, you did it right.
If not, make small adjustments now while everything is still fresh.
Step 20: Keep It Organized With the “10-Minute Rule”
Here’s the secret to maintaining your garage:
Spend 10 minutes once a week resetting it.
That’s it.
Just 10 minutes.
Put things back where they belong, straighten bins, sweep quickly.
If you ignore it for 6 months, you’ll be back to chaos.
But if you do tiny resets, your garage stays clean year-round.
Bonus Tips for a Perfectly Organized Garage
Here are a few professional-level tips that make your garage feel like it belongs in a magazine.
Use One Wall for Storage, Keep the Other Wall Clear
This makes the garage feel open and less cluttered.
Store Heavy Items on Lower Shelves
Safety first.
Put heavy bins and tools on the bottom shelf so they don’t fall.
Keep a “Donation Box” in the Garage
Anytime you find something you don’t need, toss it in the donation box.
When it’s full, drop it off.
This prevents clutter buildup.
Don’t Store Paper Items in the Garage
Paper attracts moisture, mold, and pests.
Old books, documents, and photos should never be stored in a garage.
Avoid Storing Chemicals Randomly
Paint thinner, gasoline, and pesticides should be stored safely in one controlled area.
If you have kids, consider locking cabinets.
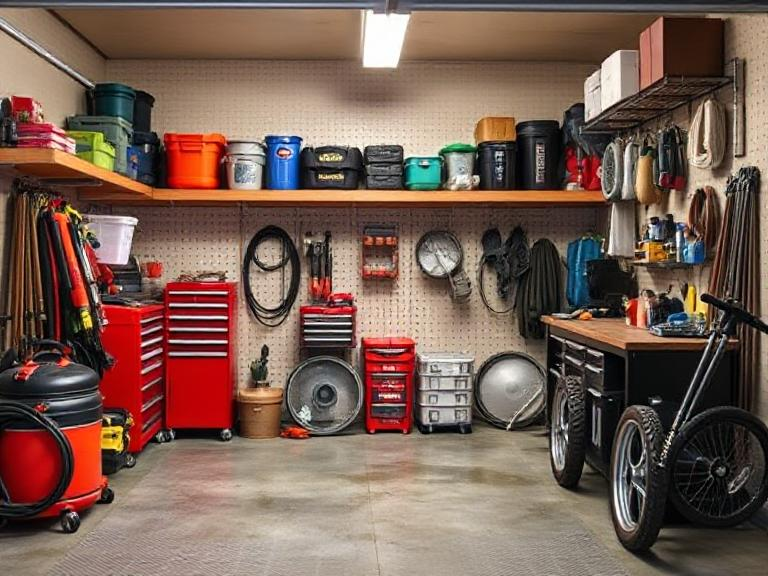
Simple Garage Organization Layout Example
If you don’t know how to arrange things, here’s an easy layout idea:
Left Wall: Tools + Workbench
- pegboard
- shelves
- tool storage
Back Wall: Seasonal Storage
- large shelving unit
- labeled bins
- overhead storage rack
Right Wall: Sports + Gardening
- bike hooks
- ball bins
- rake and shovel hooks
Near Garage Door: Trash + Recycling + Drop Zone
- trash bins
- shoe rack
- coat hooks
This layout works for most standard garages.
Common Garage Organization Mistakes to Avoid
Let’s save you from frustration.
Mistake #1: Buying storage before decluttering
You’ll waste money and store junk more neatly.
Mistake #2: Keeping everything “just in case”
That’s how clutter wins.
Mistake #3: Storing everything on the floor
Your garage will always look messy.
Mistake #4: No labeling system
You’ll forget what’s inside bins and start piling things again.
Mistake #5: No zones
Zones are what makes the garage easy to maintain.
Final Thoughts: Yes, You Can Organize Your Garage in One Weekend
Organizing a garage sounds overwhelming, but once you break it down into steps, it’s totally doable.
Here’s the truth:
You don’t need to be a professional organizer.
You don’t need to spend thousands of dollars.
You just need:
✅ one weekend
✅ a few bins
✅ shelves or hooks
✅ and a simple system
By Sunday night, you can have a garage that feels:
- clean
- spacious
- functional
- and honestly… satisfying to walk into
And the best part?
Once your garage is organized, your entire home feels more organized too.
Because the garage is where clutter starts.
Fix the garage, and you fix the chaos.
Quick Weekend Checklist (Copy & Save)
Saturday
✔ Take everything out
✔ Sweep and clean
✔ Sort into piles
✔ Donate/trash/sell
✔ Create garage zones
Sunday
✔ Install shelves and hooks
✔ Set up bins
✔ Label everything
✔ Put items back zone by zone
✔ Final walkthrough and clean up