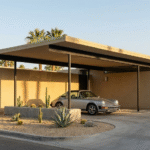
Let’s be honest: the “entryway” for most families isn’t the polished front door with the wreath on it. It’s the garage. It’s that chaotic threshold where backpacks are dumped, muddy cleats are kicked off, and groceries pile up.
If you are tired of tripping over a mountain of shoes before you even enter your kitchen, you need a Garage Mudroom.
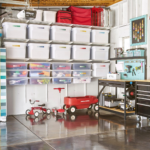
Many homeowners assume a mudroom requires a dedicated room inside the house or a contractor with a five-figure budget. False. With a free weekend and the right strategy, you can convert a blank garage wall into a stunning, highly functional “drop zone” that changes how your household operates.
Below is your comprehensive guide to building a DIY garage mudroom, packed with design logic, 2025 style trends, and the technical tips most tutorials skip.
Why the Garage is the Superior Mudroom Location
Moving your storage buffer zone to the garage isn’t just about saving space inside; it’s about hygiene and workflow.
- The “Clean House” Firewall: It stops dirt, allergens, road salt, and wet gear before they touch your interior floors.
- The “Visual Calm”: When the mess is behind the garage door, your kitchen and living room instantly feel bigger and more serene.
- Property Value Boost: In 2025 real estate markets, functional storage solutions are top-tier selling points. A custom built-in signals a well-maintained home.
Phase 1: The Strategy (Don’t Skip This)
Before you buy a single 2×4, you need to account for the unique environment of a garage. Unlike an interior room, a garage is a semi-outdoor space.
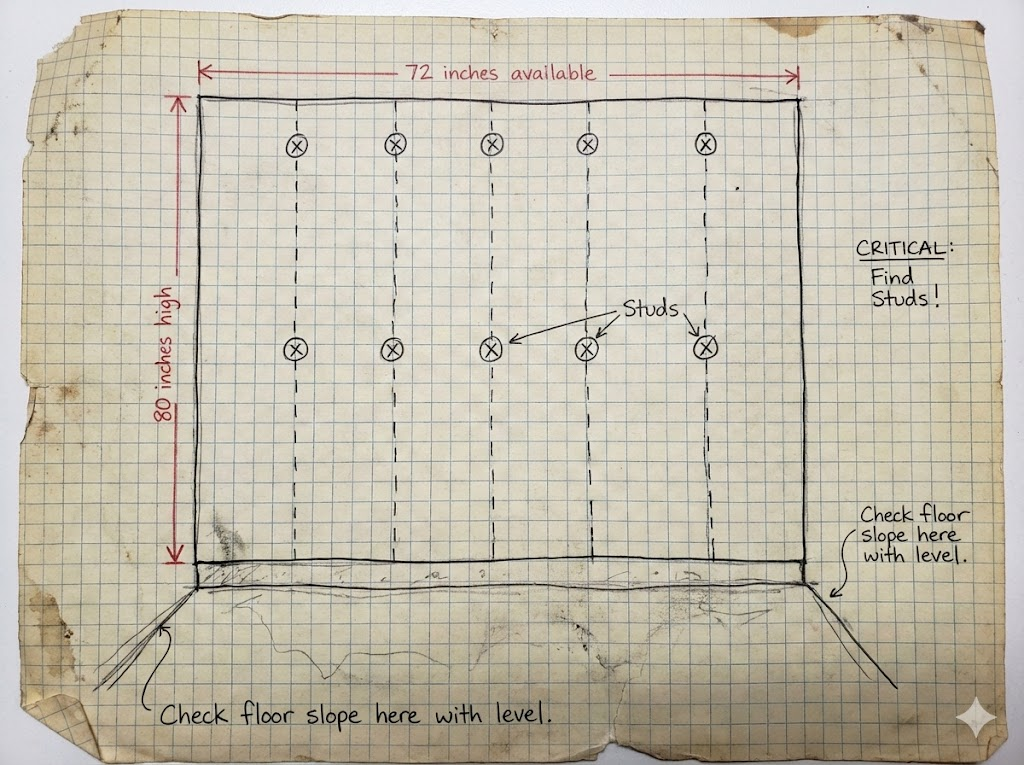
1. The “Garage Slope” Factor
Expert Insight: Most garage floors slope toward the door for drainage.
- The Mistake: Building a square bench that sits flat on the floor. It will lean away from the wall.
- The Fix: You must shim your base or use adjustable furniture feet to ensure your bench is level, even if the floor isn’t.
2. Moisture & Temperature
Standard indoor particle board (like cheap flat-pack furniture) acts like a sponge in a humid garage, swelling and warping over time.
- The Fix: Use Plywood or MR-MDF (Moisture Resistant Medium Density Fiberboard). Paint all surfaces with exterior-grade or high-scuff enamel.
3. The Traffic Flow Analysis
Don’t build your mudroom where the car door swings open.
- The Rule of Thumb: You need at least 24 inches of clearance between your parked car and the edge of the bench. If space is tight, reduce the bench depth to 12–15 inches rather than the standard 18 inches.
Phase 2: Design & Layouts
Your layout depends on your family size and available wall width.
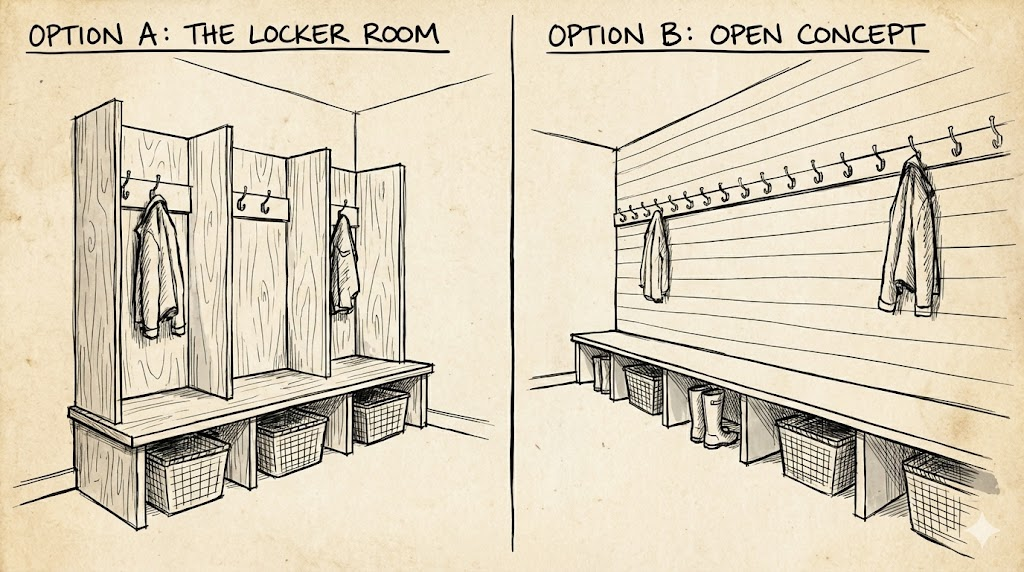
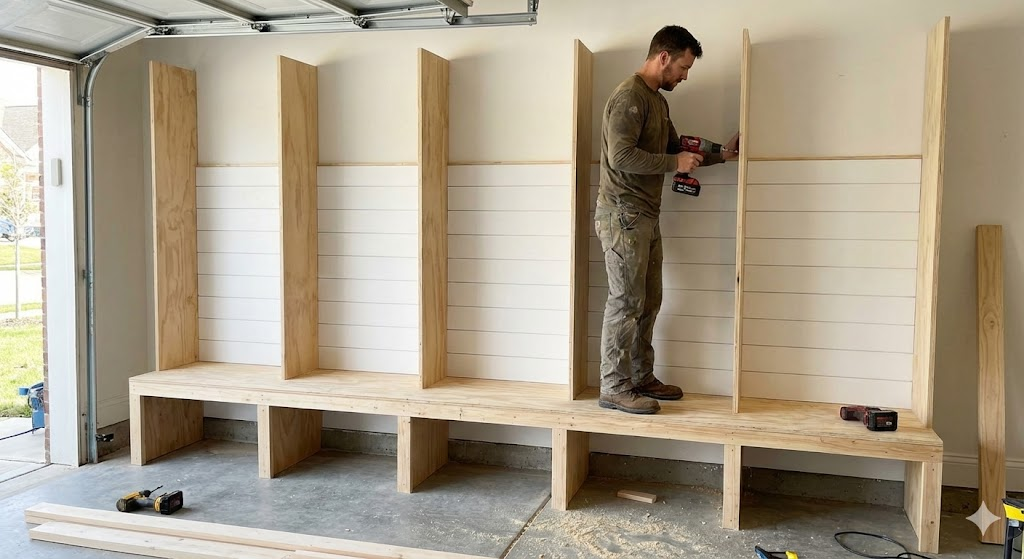
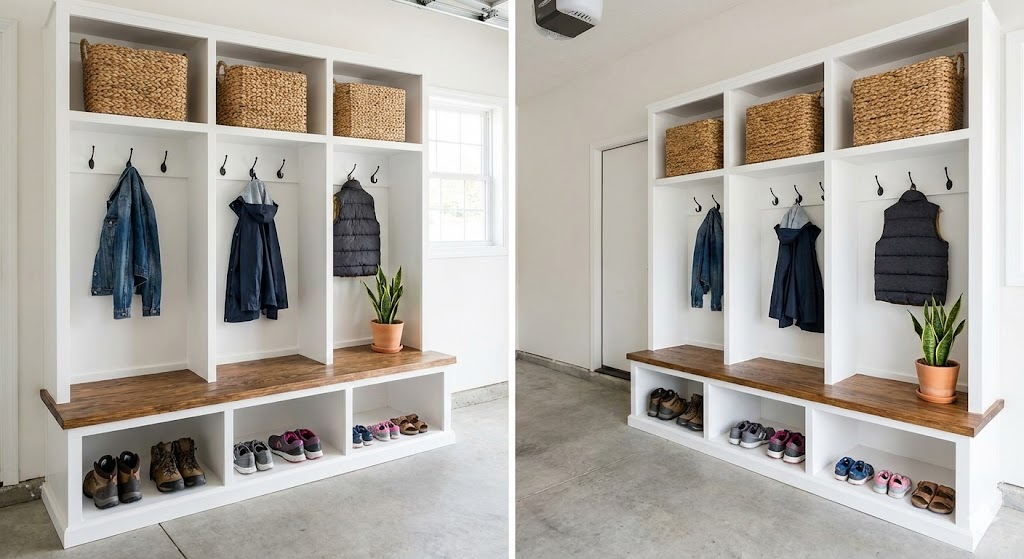
Layout A: The “Locker Room” (Best for Families)
- Structure: Vertical dividers creating separate “stalls” for each person.
- Why it works: Kids thrive on ownership. “This is my cubby” leads to better compliance with putting things away.
Layout B: The “Open Concept” (Best for Tight Spaces)
- Structure: A long floating bench with hooks mounted directly to the wall or a shiplap backer.
- Why it works: Without vertical dividers, the space feels airier and less bulky, which is crucial in smaller garages.
Layout C: The “Corner Catch-All”
- Structure: Utilizing a dead corner with an L-shaped bench.
- Why it works: Maximizes square footage that is usually wasted.
🎨 2025 Design Trends for Utility Spaces
- Color Drenching: Painting the bench, shiplap, and shelves the same moody color (Charcoal, Forest Green, or Navy) creates a high-end, custom look.
- Wood & Warmth: Pairing painted cabinetry with a natural stained wood seat (White Oak or Walnut) adds warmth to cold concrete environments.
- Matte Black Hardware: Still the king of hardware for its durability and ability to hide fingerprints.
Phase 3: The Build Guide (Weekend Timeline)
🛠️ The Tool Kit
- Must-Haves: Drill/Driver, Stud Finder, Level (2ft or 4ft), Circular Saw or Miter Saw, Tape Measure.
- Nice-to-Haves: Kreg Jig (for pocket holes), Brad Nailer (saves hours on trim).
- Safety: Eye protection and earplugs.
🧱 Materials List
- Bench Top: 3/4″ Sanded Plywood or a pre-made Butcher Block slab.
- Framing: 2x4s for the structural support.
- Carcass: 3/4″ Plywood for cubbies/shelves.
- Backing: 1×6 Tongue and Groove, Beadboard, or Shiplap (optional but recommended).
- Finish: Primer and Enamel Paint (Semi-Gloss or Satin).
Step-by-Step Construction
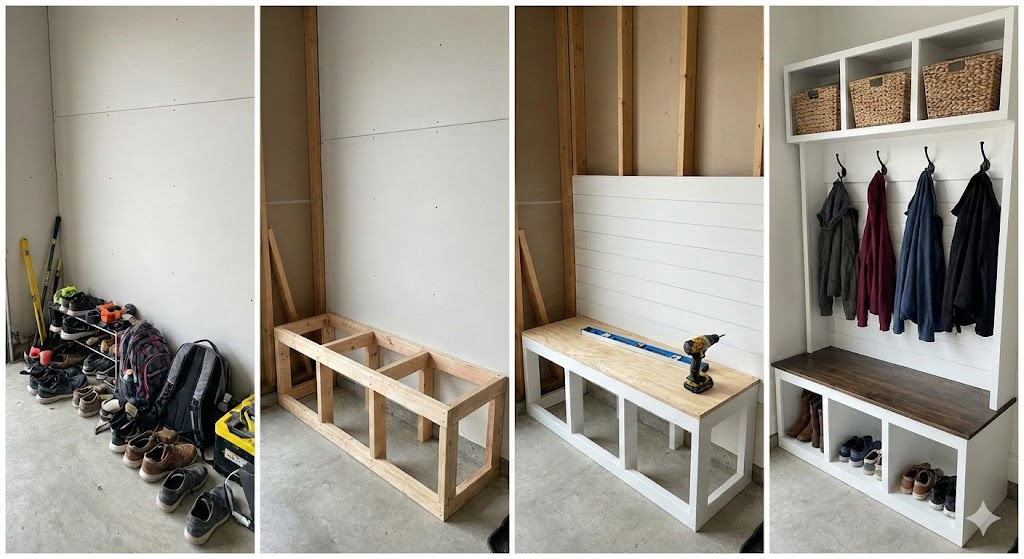
Saturday Morning: The Skeleton
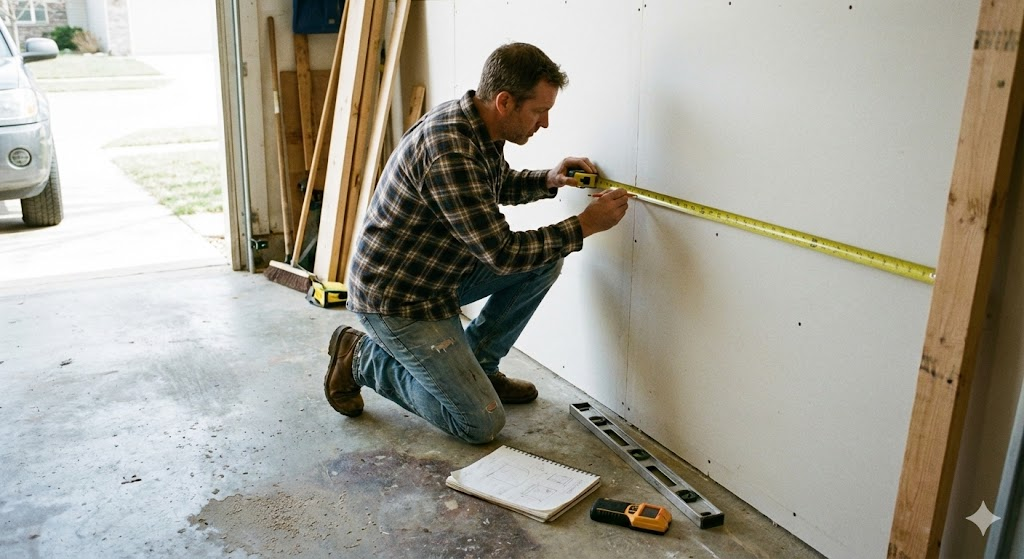
1. Locate and Mark Studs Use a stud finder to mark every stud on the wall. This is critical—your unit must be anchored to the wall frame, not just the drywall.
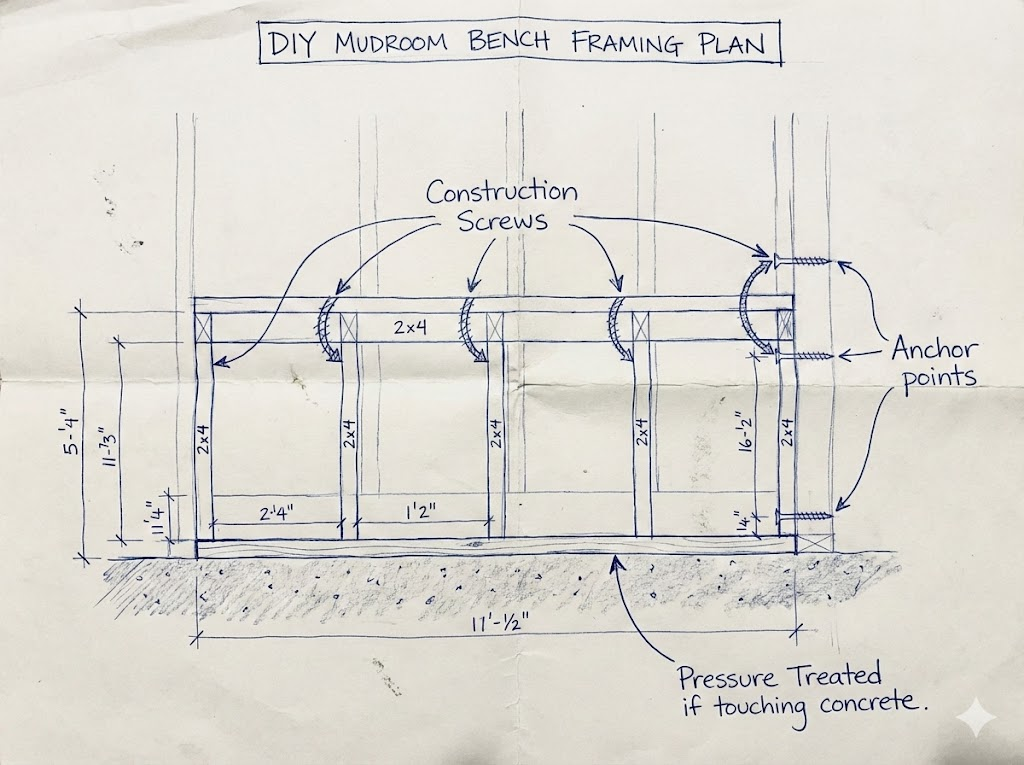
2. Build the Bench Base Construct a simple ladder frame using 2x4s.
- Pro Tip: If your bench touches the concrete floor, use Pressure Treated wood for the bottom plate to prevent rot from moisture wicking. Alternatively, mount the bench to the wall as a “floating” unit to keep the floor clear for easy sweeping.
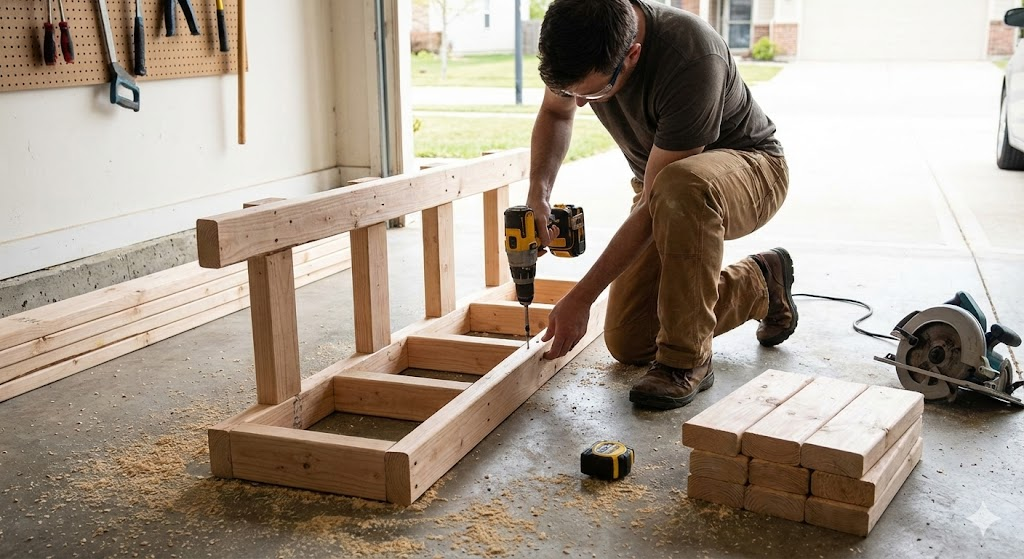
3. Anchor the Base Secure the frame to the wall studs using 3-inch construction screws. Check for levelness constantly. If the floor dips, insert shims under the legs until the bubble is dead center.
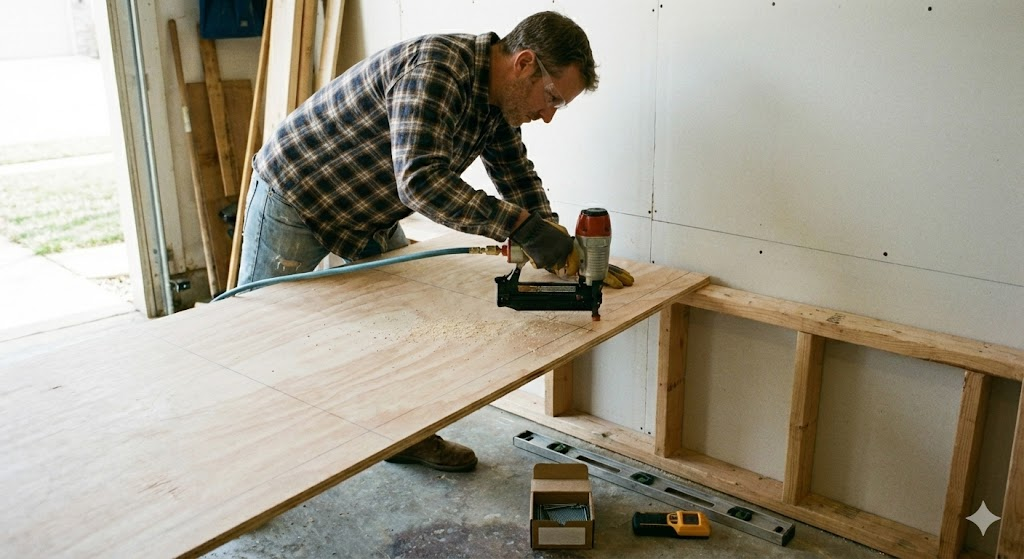
Saturday Afternoon: The Structure
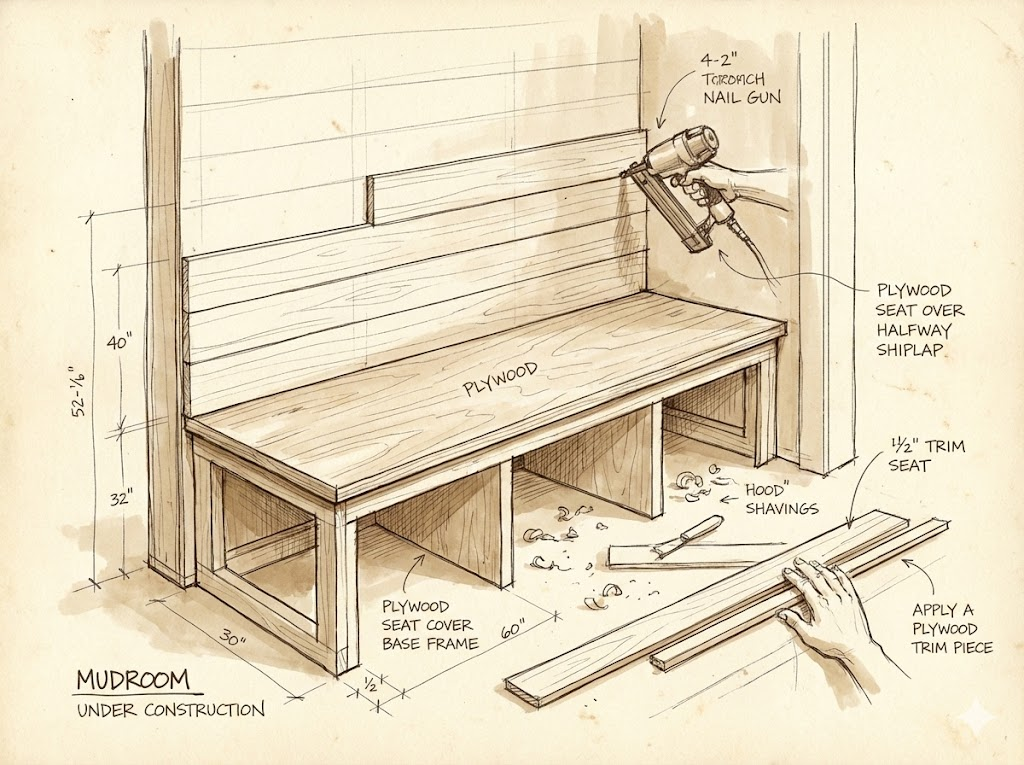
4. Install the Seat Cut your plywood or butcher block to size. Attach it to your frame from underneath or use finish nails from the top (fill holes later).
5. The Vertical Element If you are doing a “Locker” style, install your vertical plywood dividers now. If you are doing an open style, install your wall treatment (shiplap or beadboard).
- Design Note: Run the wall treatment all the way to the ceiling or stop at 6 feet and cap it with a shelf.
Sunday Morning: Storage & Trim
6. The “Upper Management” (Shelves) Install a top shelf spanning the length of the unit. This is for seasonal storage (bins for winter hats in summer, beach towels in winter).
7. Trim It Out This separates “DIY” from “Pro.” Use 1×2 or 1×3 trim pieces to cover the raw plywood edges (face framing). It makes the unit look chunky and substantial.
Sunday Afternoon: Finish & Style
8. Paint & Protect Sand everything smooth with 120 then 220 grit paper. Apply a high-quality primer. Follow with two coats of durable enamel paint.
- Don’t Skip: Let the paint cure. Ideally, wait 24-48 hours before placing heavy objects on the shelves.
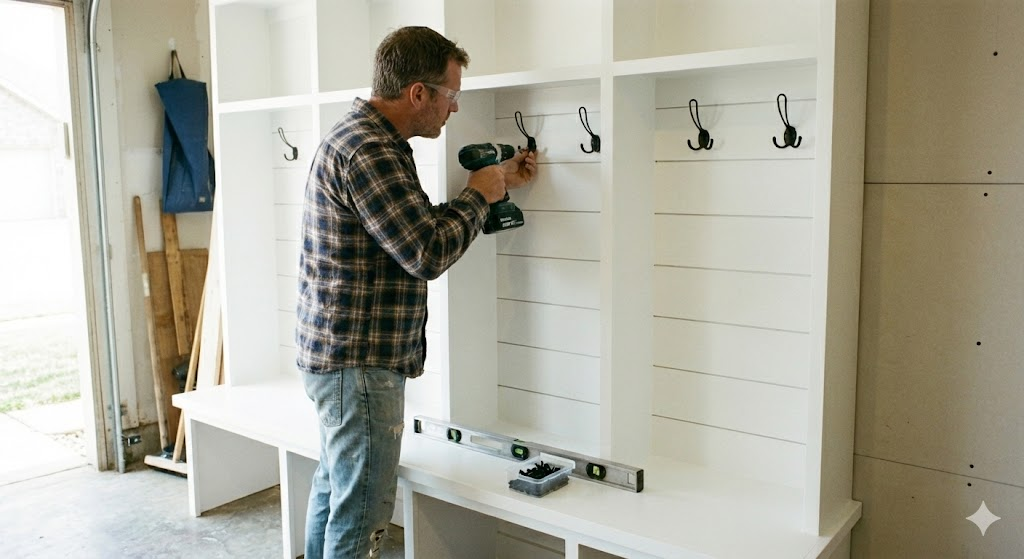
9. Install Hardware
- The Height Rule: Mount main coat hooks at 60–64 inches off the floor.
- The Kid Rule: Mount a second row of smaller hooks at 40 inches for backpacks and little jackets.
Phase 4: Styling & Organization Logic
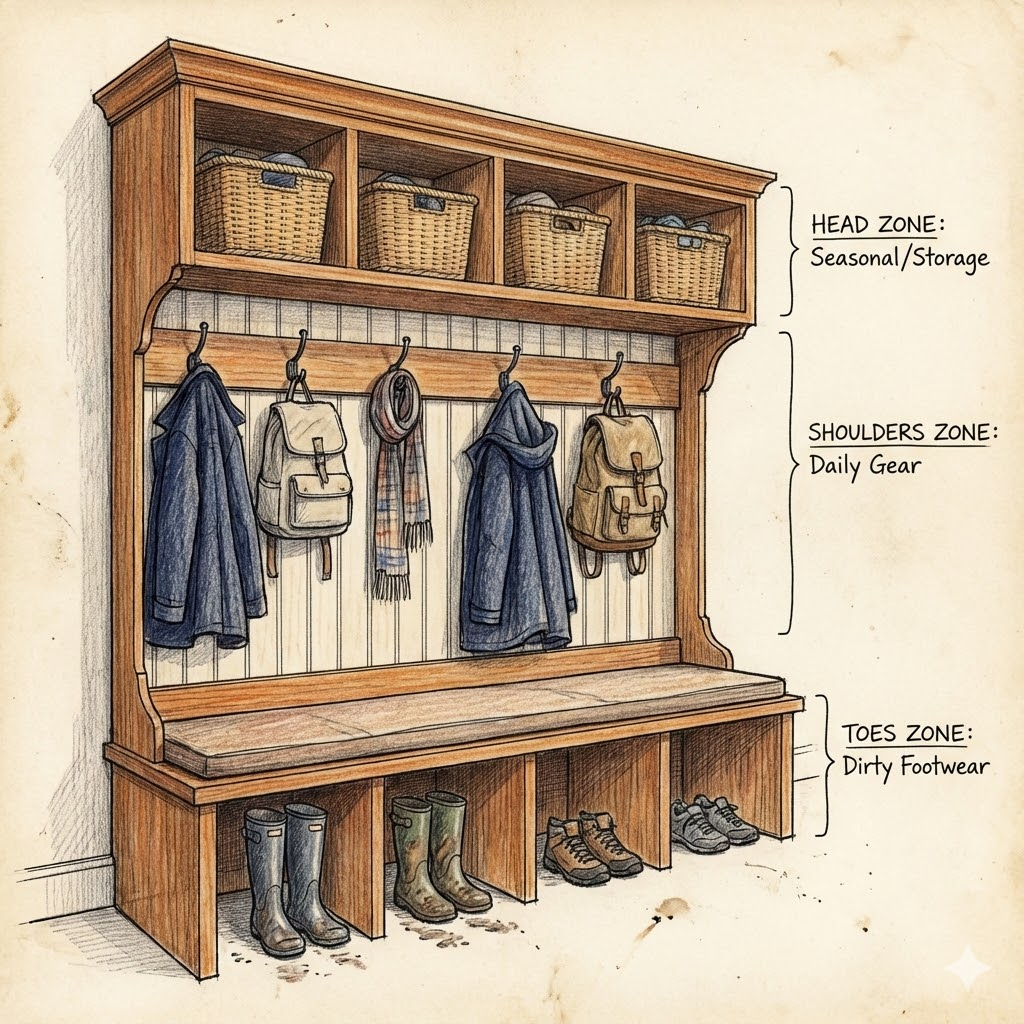
A mudroom is only as good as its organizational system. Use the “Head, Shoulders, Knees, and Toes” method:
| Zone | Items to Store | Storage Solution |
| Head (High) | Off-season gear, bulk supplies | Opaque bins or baskets (hides visual clutter) |
| Shoulders (Mid) | Coats, purses, backpacks | Heavy-duty double-prong hooks |
| Knees (Bench) | Sitting area, placing groceries | Keep clear! Add a cushion if indoor; keep wood if garage. |
| Toes (Low) | Shoes, boots, cleats | Open cubbies or heavy rubber boot trays |
💡 Lighting Upgrade: Garages are notoriously dim. Install a rechargeable motion-sensor LED strip under the upper shelf. It requires no wiring and provides luxury task lighting when you walk in.
Common Mistakes to Avoid (The “Gotchas”)
- Ignoring the Baseboards: Do not build your bench in front of existing baseboards. Remove the baseboard on that wall first so the unit sits flush against the drywall.
- Using Standard Paint: Latex wall paint will peel on a bench seat. Use a “Cabinet and Trim” enamel or a Urethane-based paint for hardness.
- Forgetting Power: If possible, cut a hole in the back of a cubby to access an outlet. It creates the perfect charging station for power tools or vacuums.
Frequently Asked Questions
Q: Can I use IKEA furniture (like Kallax or Billy) in the garage? A: You can, but with caution. IKEA furniture is particle board. If your garage gets very humid or damp, it will eventually swell. To make it last, seal all raw edges with glue or paint and set the unit on a raised platform so it doesn’t touch the concrete.
Q: How do I keep spiders and bugs out of the shoes? A: This is a real concern! Avoid leaving shoes on the floor. Use the lower cubbies. Keeping the area swept and free of cardboard boxes (which insects love) helps immensely. You can also place cedar blocks in the cubbies, which naturally repel many pests.
Q: What is the total cost for this project? A:
- Budget DIY: $150–$250 (Using pine boards, simple paint, and re-using hooks).
- Mid-Range: $300–$500 (Plywood carcass, nice trim, good paint, baskets).
- High-End: $600+ (Butcher block bench, hardwood plywood, designer hardware).
Final Thoughts
A garage mudroom is the ultimate “weekend warrior” project. It requires moderate skills but delivers a massive payoff in daily organization. By Monday morning, you won’t just have a new piece of furniture; you’ll have a smoother, cleaner, and calmer routine.
Ready to build? Measure your wall right now, sketch your layout, and head to the hardware store. Your clutter-free life awaits.