DIY Custom Closet – IKEA TARVA & IVAR HACK
Transform Your Small Closet into a Luxurious Space
My husband and I bought an almost perfect house back in 2015. It met most of our criteria except that it lacked a proper master suite. The bedroom was small but it wasn’t the worst. The bathroom and closet on the other hand… pretty horrible. So we came up with a renovation plan to make the master suite of our dreams. It involved gutting the closet, master bathroom, and the den that was behind both of those rooms. In this post, I’ll share the full process for our DIY custom closet.
Getting Ready for the Build
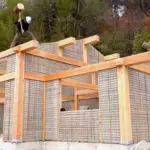
Here is what the project looked like on demo day. I remember the feeling of “Oh, no, there is no turning back now!” The room to the left with the light on is the old closet, and the red room in the back is the old den. We removed all of the plumbing, framed for a door to the den/new bathroom, and then moved the closet wall to the right to make the closet as big as we could, while still allowing a hallway where the old bathroom was.
Here is a picture after we had framed for the walls and installed drywall. The closet is the room to the left, the bathroom is now in the back, and we have a hallway to get to each of the rooms from the master bedroom. This photo was taken from the master bedroom.
And here is the new closet space. It was about 18″ deeper than the old closet, and the door was now in the hallway rather than the bedroom. For reference, my expanded closet final floor dimensions were 80″ deep by 100″ wide and my ceilings are 8′ tall.
We Painted, Floored, and Got Ready to Build!
We painted the walls, laid some new hardwood flooring, and then we were ready to start building the master closet! Looking back, I have no clue why I wasted my time painting a closet that I was going to almost completely cover the walls with wood. I don’t know if I hadn’t fully planned out my design or if I just forgot, but don’t do this if you build a similar closet. It’s a waste of time and paint!
How to Build a Custom DIY Closet
This post will take you through every step of building a custom DIY closet using IKEA TARVA and IVAR hack.
Materials Needed:
* 2×4 boards (for base)
* 3/4″ hardwood plywood for base, sides, and shelves
* IKEA TARVA 5-Drawer Chest
* IKEA IVAR 3-Drawer Chest (We used two of these). The IVAR is discontinued, so I would recommend using the 3-drawer TARVA option in place of this.
* 24″ x 48″ craft boards (One for on top of each IVAR Chest of Drawers)
* 1×2 boards (for the face trim)
* Closet rods
* Pull handles
* Base boards
* Quarter Round
* Wood screws
* Pocket hole screws
* Brad nails
* Sandpaper
* Shelf pins
* Wood filler
* Caulk
* Paint
* Primer
* Paint roller
* Paint brush
* Tools
+ Drill
+ Pocket hole jig
+ Shelf pin jig
+ Miter saw
+ Table saw
+ Oscillating tool
+ Hammer
+ Level
+ Stud finder
+ Tape measure
+ Brad nailer
+ Staple gun
+ Speed square
+ Sander
+ Clamps
+ Caulk gun
Design Considerations:
There are a few things to consider when designing a functional closet. If you’re looking for dimensions and have questions on depths and heights for hanging rods in closets, check out this post from HGTV that provides all the details you need. You’ll want to think about things like depth and height of the hanging clothes, height of shoes, and maximum reachable heights for hanging clothes.
Step 1: Build a Base Frame
Use 2×4 boards to build a base. The depth of the base should equal the width of the IKEA chest of drawers. Since our design used both of the dressers, you can see that the bases on the left and right walls are a little bit wider than the base on the back wall (because the IVAR is deeper than the TARVA). We had a weird bump out in the back left corner that we had to work around, which is why I designed that corner to be shelves from floor to ceiling. For the base, we added supports every 18″ or so and screwed the frame together using wood screws. After it was set in place, and we confirmed that it was level, we screwed the back into studs in the wall.
Step 2: Add Plywood to the Base
Cut 3/4″ hardwood plywood to match the dimensions of your base frame and then attach it using glue and a nail gun.
Step 3: Install IKEA Dressers
My design included three of the IKEA dressers. The 5-drawer TARVA was centered on the back wall, and an IVAR was centered on each of the left and right walls. It worked out really well for my space that centering the dressers allowed for the proper space for hanging shirts to the right of the TARVA on the back wall and left usable space for hanging clothes and building shelves everywhere else.
Step 4: Add Wall Backing
I wanted the closet to look high-end, so we added wood backing instead of having drywall behind the shelves. For this, we used 1/4″ hardwood plywood sheets. We cut them so that the seams would be behind where the shelf walls were, so that you wouldn’t see them. The 1/4″ plywood sheets were attached to the wall using a staple gun.
Step 5: Build and Install Boxes for Each of the Sections
By sections, I mean hanging sections and/or shelves. When we cut the left and right walls and top for the box, we made them 3/4″ shallower than the IVAR dresser to allow 1×2 trim to sit flush. You’ll also want to account for the 1/4″ plywood wall backing, so the boxes should be 1″ shallower than the IKEA dresser.
Step 6: Install a Nicer Top for the IVAR Dresser
Note that this step is only required if you are using the IVAR dresser (which has been discontinued). If you look at the picture above, you can see that the TARVA comes with a nice finished top. You won’t need to do anything special with that. The IVAR on the other hand comes with a top that doesn’t quite look finished. To solve this problem, we bought 24″ x 36″ x 3/4″ craft boards and cut them to size.
Step 7: Install Shelves
For the shelves, we used a Kreg Jig to drill pocket holes, which allowed us to easily install a bunch of shelves for our shoes. The pocket holes were on the underside of the shelves. I later filled the visible ones with wood filler so that you couldn’t see them after the closet was painted.
Step 8: Install the Trim
Use 1×2 boards as trim to trim out all of the unfinished plywood edges. I totally forgot to take a picture of the closet with the trim installed before I painted, but here is a lovely picture of me after sanding the closet and prepping it for paint.
Step 9: Prep for Paint
Use wood filler to fill any of the holes and imperfections. At a minimum, you’ll want to fill the nail gun holes. To prep for paint, you’ll want to sand all of the wood surfaces. I used my power sander that I absolutely love. It got to most spots, but I did have to hand sand with just paper in a few areas.
Step 10: Paint
Prime the entire surface with primer. Then, use the paint color of your choice and apply at least 2 coats. I actually had to do 3 in some areas. This part wasn’t fun, but don’t skimp on the paint. You’re going to be taking shoes and clothes in and out of this closet every day, so you want to be sure that the surface is durable.
Step 11: Install the Hardware
I purchased some pull handles from Amazon. Follow the instructions for spacing for the handles that you choose, and drill holes. Then, attach the handles with the hardware that came with them.
Step 12: Install Adjustable Shelves (Optional)
This step is optional. I wanted the shelves above the IKEA TARVA dresser to be adjustable in height since I wasn’t sure exactly what I wanted to store in that space. To do this, we first built shelves that fit the space and had 1×2 trim on the front face. I painted these as well.
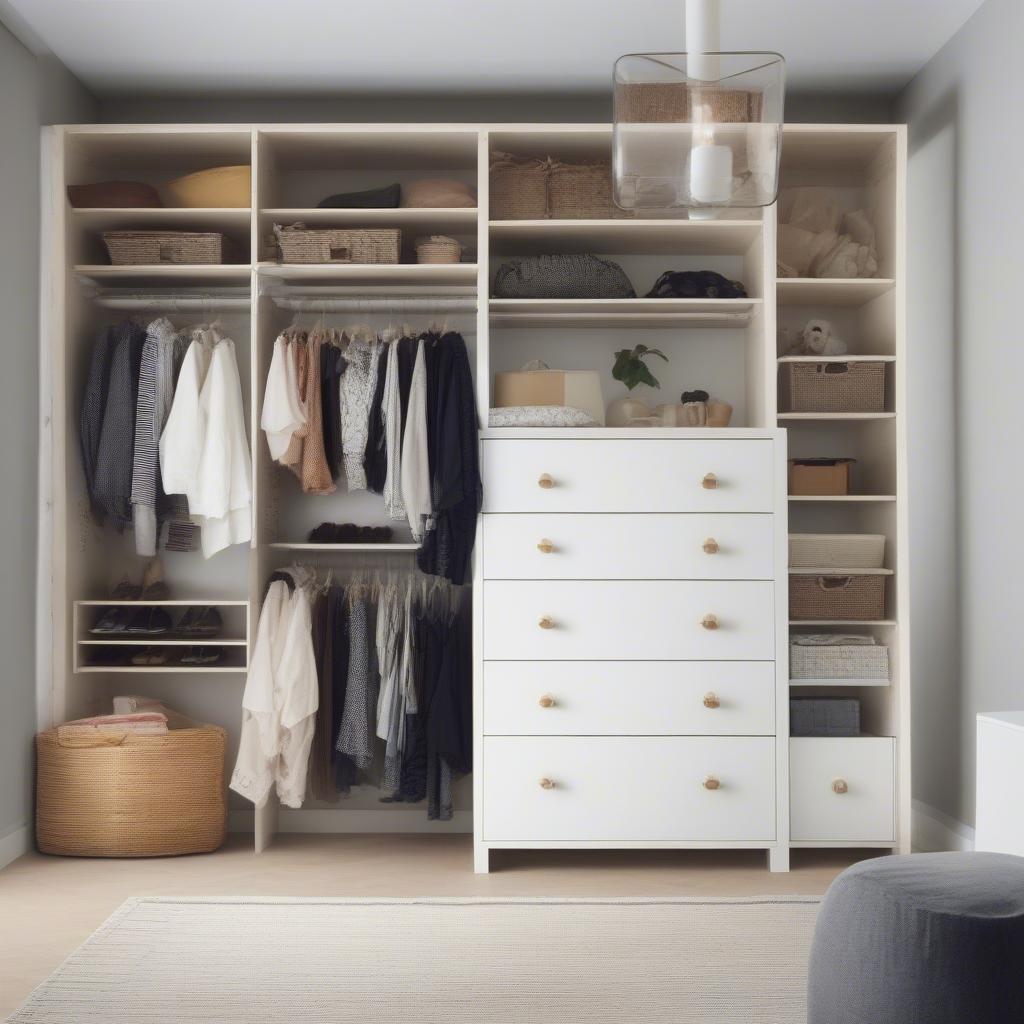
Finished Closet Pictures
The last step is to move your clothes and shoes in! I recently had a three-day weekend since my office is closed on President’s Day, and it gave me that extra motivation to finally cross this project off my list. We moved our stuff in that Sunday, and it’s been so amazing to have a closet near our bedroom again. I still can’t believe that this is our closet or even more that we actually built it!
Our master suite remodel is the biggest DIY/renovation project that we’ve taken on, but I’m so glad that we did it. I learned a ton in the process and ended up with an absolutely beautiful master closet in the end.
Happy Building!
I hope you found this tutorial helpful and inspiring. Don’t hesitate to reach out if you have any questions or need further clarification on any of the steps. Happy building, and I hope you enjoy your new closet as much as I do!
More Closet Related Articles:
* 10 Must-Have Closet Accessories for Organized Living
* How to Remove Wire Shelves
* More IKEA Hacks
I also have a full tutorial for a DIY Custom Pantry that you may be interested in.
Share Your Thoughts!
Have you ever attempted a DIY closet project? What did you learn from the experience? Share your thoughts and experiences in the comments below! What materials are needed to build a custom DIY closet using IKEA TARVA and IVAR hack? *2×4 boards, 3/4″ hardwood plywood, IKEA TARVA 5-Drawer Chest, IKEA IVAR 3-Drawer Chest, 24″ x 48″ craft boards, 1×2 boards, closet rods, pull handles, base boards, quarter round, wood screws, pocket hole screws, brad nails, sandpaper, shelf pins, wood filler, caulk, paint, primer, paint roller, paint brush, drill, pocket hole jig, shelf pin jig, miter saw, table saw, oscillating tool, hammer, level, stud finder, tape measure, brad nailer, staple gun, speed square, sander, clamps, caulk gun.*
What are the dimensions of the finished closet? *The final floor dimensions of the expanded closet were 80″ deep by 100″ wide with 8′ tall ceilings.*
How do you attach the hardwood plywood to the base frame? *Cut 3/4″ hardwood plywood to match the dimensions of your base frame and then attach it using glue and a nail gun.*
What do you use to add backing to the closet walls? *1/4″ hardwood plywood sheets are used for the wood backing, attached to the wall using a staple gun.*
Why did you install a nicer top for the IVAR dresser? *The TARVA comes with a nice finished top, but the IVAR’s top needs finishing. We bought 24″ x 36″ x 3/4″ craft boards and cut them to size.*
Which tools are needed for this project? *Drill, pocket hole jig, shelf pin jig, miter saw, table saw, oscillating tool, hammer, level, stud finder, tape measure, brad nailer, staple gun, speed square, sander, clamps, caulk gun.*
How do you install the hardware, such as pull handles? *Purchase pull handles and follow the instructions for spacing. Drill holes and attach the handles using the included hardware.*
Is it necessary to include adjustable shelves? *No, this step is optional. Adjustable shelves were added above the IKEA TARVA dresser, which involved building boxes with 1×2 trim on the front face and making them漆able.*
What are the steps involved in preparing the closet for painting? *Fill nail gun holes, sand all wood surfaces thoroughly.*
Are there any DIY closet projects mentioned in the related articles section? *Yes, a full tutorial for a DIY Custom Pantry is mentioned.*