DIY Farmhouse Shelves That Add Instant Character to Any Room
There is something undeniably magnetic about the farmhouse aesthetic. It’s a style that bridges the gap between the past and the present, blending the rugged durability of rural life with the clean, sophisticated lines of modern design. But if you’ve ever browsed through a high-end home decor catalog, you know that “rustic charm” often comes with a very non-rustic price tag. This is exactly why DIY farmhouse shelves have become the ultimate weekend project for homeowners and renters alike.
Shelving is more than just a storage solution; it’s a canvas for your personality. Whether you are looking to clear up counter space in a cramped kitchen, add some warmth to a cold bathroom, or create a stunning focal point in your living room, farmhouse shelves are the answer. In this comprehensive guide, I’m going to walk you through everything you need to know—from selecting the right wood to mastering the art of the “weathered” look—to create shelves that look like they cost a fortune but were made with your own two hands.
Why the Farmhouse Look Works in Every Home
You might be wondering, “Will farmhouse shelves work in my modern apartment?” The answer is a resounding yes. The beauty of the farmhouse style lies in its use of natural materials. Wood, metal, and stone are timeless. When you add a chunky wooden shelf to a sleek, modern room, you aren’t just adding storage; you’re adding texture. You’re breaking up the “flatness” of drywall and paint with something that has grain, knots, and history.
Farmhouse design is centered around the concept of hygge—a Danish word for coziness and soulfulness. DIY shelves allow you to bring that soul into your home. Because you are building them yourself, you can customize the length, depth, and finish to perfectly suit your specific space. No more settling for mass-produced particle board that sags under the weight of a few books. We’re talking about solid wood, sturdy brackets, and character that lasts a lifetime.
The Essential Toolkit for Your Shelving Project
Before we dive into the sawdust, let’s talk about your arsenal. You don’t need a professional-grade woodshop to build beautiful shelves, but having the right tools will make the process smoother and the end result much more professional.
1. The Power Drill
This is your best friend. You’ll need it to drive screws into the wall studs and to assemble the shelves themselves. A cordless drill with a variety of bits (including a countersink bit) is ideal.
2. The Level
If there is one tool you cannot skip, it’s this one. A shelf that isn’t level isn’t just an eyesore; it’s a hazard. A standard 24-inch level is perfect for most shelving projects.
3. The Saw
If you’re lucky, your local hardware store (like Home Depot or Lowe’s) will cut your lumber to size for you. However, having a miter saw or even a simple circular saw at home gives you the freedom to make precise adjustments on the fly.
4. The Sander
Raw lumber is often rough and can even carry “mill marks.” An orbital sander will help you achieve a smooth finish that’s ready for stain or paint without the arm-aching labor of hand-sanding.
5. Stud Finder
Safety first! Farmhouse shelves—especially the chunky, solid wood variety—are heavy. You must anchor them into the wooden studs behind your drywall. A reliable stud finder is worth its weight in gold.
Choosing the Right Wood: New vs. Reclaimed
The soul of a farmhouse shelf is the wood itself. You have two main paths here: buying new lumber and distressing it, or sourcing reclaimed wood.
The Case for New Lumber (Pine and Cedar)
Common board pine is the most budget-friendly option. It’s soft, easy to work with, and takes stain quite well if you use a wood conditioner. Cedar is another great choice, offering a beautiful natural scent and a more distinct grain pattern. If you want a more “expensive” look without the price tag, look for “Select Pine”—it has fewer knots and a straighter grain.
The Magic of Reclaimed Wood
If you want instant history, reclaimed wood is the way to go. Old barn wood, floorboards from demolished factories, or even wood from old pallets can be transformed into stunning shelves. The “imperfections”—nail holes, saw scars, and weathering—are exactly what give these shelves their character. Just be sure to check reclaimed wood for pests and ensure it hasn’t been treated with harmful chemicals (especially important for kitchen shelves).
Project #1: The Classic Floating Chunky Shelf
Floating shelves are the “gold standard” of the farmhouse look. They appear to sprout directly from the wall with no visible support, creating a clean yet powerful look. Here is how you can build a hollow-box floating shelf that looks like a solid 4×10 beam.
Step 1: Build the Internal Bracket
The “skeleton” of your shelf is a simple 2×4 frame. Cut one long piece (the length of your shelf minus the thickness of your outer boards) and several short “arms” (the depth of your shelf). Screw the arms into the long piece to create a “comb” shape. This bracket will be screwed directly into your wall studs.
Step 2: Create the Outer Box
Using 1×6 or 1×8 pine boards, create a three-sided box (top, bottom, and front face). You can use wood glue and finish nails for this. For a professional look, use mitered corners so the end grain isn’t visible, though many farmhouse enthusiasts prefer the “butt joint” look for a more rustic feel.
Step 3: Sanding and Distressing
Before you mount anything, sand your box smooth. If the wood looks “too new,” take a hammer, a chain, or a large screw and gently beat the wood. This creates “manufactured history.” Focus on the edges and corners where natural wear would occur.
Step 4: Installation
Find your studs, level your 2×4 bracket, and screw it into the wall using 3.5-inch deck screws. Once the bracket is secure, slide your finished outer box over the 2×4 arms. Secure the box to the bracket by driving small finish nails through the top of the shelf into the 2×4 arms.
Project #2: Industrial Pipe & Wood Shelves
If your version of “farmhouse” leans a bit more toward “industrial,” this project is for you. This style is incredibly sturdy and perfect for heavy items like cookbooks or cast iron pans.
The Materials
You’ll need black iron pipes, floor flanges, and caps, which you can find in the plumbing aisle. For the wood, a thicker 2-inch board (like a 2×10) works best to balance the weight of the metal.
The Process
1. Clean the Pipes: Industrial pipes come coated in a greasy residue to prevent rust. Clean them thoroughly with degreaser or mineral spirits before painting them with a matte black spray paint.
2. Prepare the Wood: Stain your wood boards. A dark walnut or a weathered gray stain works beautifully with black metal.
3. Assemble the Brackets: Screw the pipe into the floor flange, then add the cap to the other end.
4. Mounting: Screw the flanges into the wall (again, hitting studs is vital!). Once the pipe brackets are up, simply lay your wood across them. You can secure the wood to the pipes using “U-clips” on the underside for extra stability.
The Art of Finishing: How to Get That Perfect “Farmhouse” Glow
Staining wood is where the magic happens. A raw piece of pine can be transformed into “antique oak” in about 20 minutes if you know what you’re doing. Here are my top secrets for a flawless finish:
1. Wood Conditioner is Non-Negotiable
Softwoods like pine absorb stain unevenly, leading to a blotchy, amateur look. Always apply a pre-stain wood conditioner first. It levels out the “pores” of the wood, ensuring the stain goes on smoothly.
2. The “Dry Brush” Technique
If you want a whitewashed or “shabby chic” look, don’t just paint the shelf white. Dip your brush in white paint, wipe most of it off on a paper towel, and then lightly drag it across the wood grain. This allows the natural wood to peek through, giving it that sun-bleached farmhouse vibe.
3. Choosing Your Stain Color
- Dark Walnut: Classic, cozy, and high-contrast.
- Weathered Oak: A subtle, greyish-tan that looks like aged driftwood.
- Early American: A warm, medium-brown that feels traditional and inviting.
4. Protecting the Surface
If these shelves are going in a kitchen or bathroom, they need protection from moisture. A matte polyurethane spray is the best option. It protects the wood without adding a plastic-like shine that would ruin the rustic aesthetic.
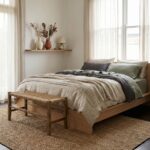
Styling Your Shelves: From “Messy” to “Masterpiece”
Once your shelves are up, the real fun begins. Styling is what actually adds the “character.” Many people make the mistake of just lining up books like a library, but farmhouse styling is about layers and textures.
The Rule of Thirds
Don’t center everything. Group items in threes. A tall vase, a medium-sized frame, and a small candle make a visually pleasing “triangle.”
Mix Your Textures
Combine “hard” and “soft” elements. Place a metallic clock next to a woven basket. Add a trailing plant (like a Pothos) to soften the hard lines of the wooden shelves. The contrast between the organic green leaves and the dark wood is the hallmark of the modern farmhouse look.
Negative Space is Your Friend
You don’t need to fill every inch of the shelf. Leaving some “white space” allows the eye to rest and makes the items you do display stand out more. If the shelf is too crowded, it just looks like clutter.
Incorporate Personal History
The best farmhouse shelves tell a story. Maybe it’s an antique flour sifter from your grandmother’s kitchen, a piece of coral from a beach vacation, or a stack of vintage books found at a flea market. These “artifacts” are what turn a house into a home.
Common DIY Mistakes to Avoid
Even the most seasoned DIYers run into trouble. Here are a few pitfalls to watch out for:
1. Using the Wrong Screws: Drywall anchors have their place, but not for heavy farmhouse shelves. Always aim for the studs. If you absolutely cannot hit a stud, use heavy-duty toggle bolts, but be mindful of the weight limit.
2. Forgetting the Sanding Grits: Don’t just jump to a fine sandpaper. Start with 80-grit to get the big imperfections out, move to 120-grit, and finish with 220-grit. This progression is what creates that “buttery” feel.
3. Rushing the Drying Time: I know you’re excited to put your decor up, but if you place a vase on a shelf that is still “off-gassing” or slightly tacky from the stain, you will ruin the finish (and possibly the vase).
4. Over-distressing: It’s easy to go overboard with the hammer and chains. Remember, you want it to look naturally aged. Think about where a shelf would naturally get bumped—the corners and the front edge—and focus your efforts there.
Maintenance: Keeping Your Shelves Beautiful
Real wood is a living material. It expands and contracts with the seasons. To keep your DIY farmhouse shelves looking their best, avoid using harsh chemical cleaners. A simple microfiber cloth is usually all you need for dusting. Every year or so, you can apply a thin coat of furniture wax or “Feed-N-Wax” to keep the wood from drying out and to maintain that rich, deep glow.
Final Thoughts: Your Home, Your Character
Building your own farmhouse shelves is a rite of passage for any DIY enthusiast. It’s a project that rewards you every time you walk into the room. You’ll look at those shelves and remember the afternoon spent in the garage, the smell of the sawdust, and the satisfaction of the first time you leveled them against the wall.
The “character” these shelves add isn’t just about the wood or the stain; it’s about the effort you put into your home. It’s about creating a space that feels curated rather than decorated. So, head to the lumber yard, grab a few boards, and start building. Your walls are waiting for a story to tell.
Happy Building!