If you shop at Costco, you already know the struggle.
You go in for “just eggs and milk”…
And somehow walk out with:
- a 24-pack of toilet paper
- a 10-pound bag of rice
- 40 snack packs
- laundry detergent the size of a small child
- bottled water
- paper towels
- cleaning wipes
- and enough cereal to feed a classroom
Costco is amazing… until you get home and realize:
“Where am I supposed to put all of this?”
Suddenly your kitchen pantry is overflowing, your cabinets won’t close, and the extra bulk items end up stacked randomly in the garage like a mini warehouse.
But here’s the good news:
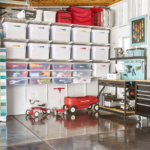
You can turn your garage into a clean, organized, easy-to-access bulk storage area by creating a Costco Storage Zone.
And trust me… once you set it up, you’ll never go back.
This guide will show you exactly how to create a Costco storage zone in your garage step-by-step, including what shelves to use, how to organize by category, and how to keep it looking neat long-term.
Let’s get into it.
What Is a Costco Storage Zone?
A Costco storage zone is basically a dedicated area in your garage where you store:
- bulk pantry items
- paper goods
- cleaning supplies
- beverages
- seasonal household essentials
- backup toiletries
Instead of stuffing everything into kitchen cabinets, you create a system where your garage becomes your “bulk inventory” space, and your kitchen stays clean.
Think of it like this:
Kitchen = daily use
Garage Costco Zone = backup stock
This one system can make your entire home feel 10x more organized.
Why You Need a Costco Storage Zone (Even If Your Garage Is Small)
Creating a Costco zone solves multiple problems at once:
✅ prevents pantry clutter
✅ makes it easy to track what you have
✅ stops you from buying duplicates
✅ keeps bulk items off the floor
✅ saves money long-term
✅ makes Costco trips way less stressful
✅ keeps your home cleaner and more minimal
And honestly?
It just feels good knowing you’re stocked up without living in chaos.
Step 1: Pick the Perfect Spot in Your Garage
The first step is choosing where your Costco storage zone will go.
You don’t need a huge garage for this.
A Costco zone can fit in:
- one corner
- one wall
- or even a small section beside your garage door
Best Places to Set Up a Costco Storage Zone
✔ along a side wall
✔ beside the door leading into your house
✔ near the garage entrance for easy unloading
✔ near a utility area (but away from water leaks)
Avoid These Spots
❌ directly on the garage floor (moisture risk)
❌ under dripping pipes
❌ in a spot that blocks your car
❌ too close to chemicals like gasoline
Pro Tip:
If you want it to feel convenient, set it up near the door you use most often to enter your home.
Step 2: Declutter That Area First
Before you build your Costco zone, you need a clean starting point.
Clear out everything in that section and sort it quickly:
- keep
- donate
- trash
If you already have bulk items scattered around, gather them all into one pile so you can see exactly what you’re working with.
This part is super important because once you see how much you actually have, you’ll realize why you need a system.
Step 3: Measure Your Space (Don’t Skip This!)
Before buying shelves, measure:
✔ wall width
✔ wall height
✔ floor space depth
✔ clearance for garage door tracks
✔ clearance for car parking
Write your measurements down.
Because the worst thing is ordering shelves and realizing they don’t fit.
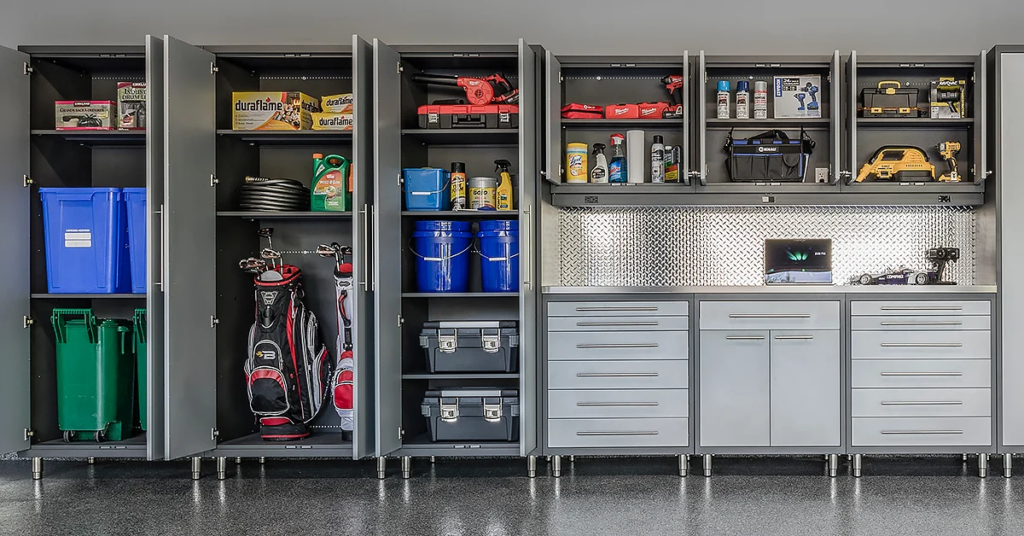
Step 4: Choose the Best Shelving for Bulk Storage
This is where your Costco zone goes from “messy corner” to “organized warehouse.”
Best Shelf Type for Costco Storage
Heavy-duty metal shelving racks are the best option.
Why?
Because they hold a lot of weight and are perfect for bulky items like water cases, canned food, and paper towels.
Recommended Shelf Features
✔ adjustable shelves
✔ at least 18 inches deep
✔ strong weight capacity
✔ open wire shelves (good airflow)
✔ easy assembly
Shelf Size Recommendation
A great standard shelf is:
- 48 inches wide
- 72 inches tall
- 18 to 24 inches deep
If you have space, two shelves side by side looks amazing and gives you serious storage power.
Step 5: Get the Right Storage Bins (This Makes It Pinterest-Worthy)
Costco products look chaotic when left in their original packaging.
If you want your Costco storage zone to look clean, you need bins.
Best Bin Types for Costco Storage
✔ clear bins with lids
✔ stackable plastic totes
✔ open-top baskets (for grab-and-go snacks)
✔ labeled crates
Why bins are important:
- they stop small items from falling everywhere
- they keep things grouped
- they look visually neat
- they make restocking easy
Step 6: Create “Zones Inside the Zone” (This Is the Secret)
Here’s the trick most people miss.
You’re not just creating a Costco corner.
You’re creating categories.
This makes your system feel like a mini store.
Costco Zone Categories to Create
Here are the best categories for most homes:
🧻 Paper Goods Zone
- toilet paper
- paper towels
- tissues
- napkins
🧼 Cleaning Zone
- laundry detergent
- dish soap
- trash bags
- disinfecting wipes
- sponges
🥫 Pantry Backup Zone
- canned goods
- pasta
- rice
- cereal
- sauces
🍪 Snacks Zone
- granola bars
- chips
- crackers
- snack packs
- cookies
🧴 Toiletries Zone
- shampoo
- body wash
- toothpaste
- deodorant
🥤 Drinks Zone
- water bottles
- soda
- juice boxes
- sports drinks
🐶 Pet Supplies Zone
- dog food
- cat litter
- treats
🧊 Party/Seasonal Zone
- disposable plates
- cups
- holiday supplies
- extra coolers
Once you divide your storage into these sections, it becomes ridiculously easy to maintain.
Step 7: Use the Best Shelf Layout Strategy
Here’s how to arrange shelves like a pro.
Bottom Shelf = Heavy Items
Put these on the bottom:
- bottled water
- soda cases
- dog food bags
- heavy detergent containers
Middle Shelves = Most Used Items
This is the prime real estate.
Store:
- snacks
- paper towels
- wipes
- canned food
Top Shelf = Rarely Used Items
Store:
- extra party supplies
- seasonal bulk items
- backup bins
Rule of Thumb:
If you grab it weekly, it belongs at waist or eye level.
Step 8: Label Everything (Yes, Even If It Feels Obvious)
Labeling is what makes your Costco zone stay organized long-term.
Without labels, your family will just throw things anywhere.
Best Labels for Costco Storage
✔ large labels
✔ waterproof labels
✔ bold black text
✔ simple category names
Example labels:
- “Snacks”
- “Cleaning Supplies”
- “Paper Towels”
- “Canned Food”
- “Breakfast Items”
- “Toiletries”
Pro Tip:
Labels make your garage look like a professional pantry, and Pinterest users LOVE that.
Step 9: Create a “Restock System” for Your Kitchen
This is where the Costco zone becomes life-changing.
Instead of bringing 20 things into the kitchen at once, you treat your garage like the stockroom.
Simple Restock Rule
- Keep one of each item inside the kitchen
- Keep the backups in the garage
- When something runs out inside, restock from the garage
This keeps your kitchen pantry clean and uncluttered.
Step 10: Add a “First In, First Out” System (So Nothing Expires)
If you’ve ever found expired snacks or old canned food… you need this.
Use the FIFO method (first in, first out).
How FIFO Works:
- put new items in the back
- move older items to the front
That way you always use the older stock first.
This prevents waste and saves money.
Step 11: Make It Look Aesthetic (Because Pinterest Loves Pretty)
Let’s be honest.
If your Costco zone looks good, you’ll want to keep it organized.
Here are quick ways to make it look clean and aesthetic:
Easy Costco Zone Glow-Up Ideas
✔ use matching bins
✔ keep everything off the floor
✔ avoid messy cardboard boxes
✔ group similar colors together
✔ stack paper products neatly
✔ add a small “inventory clipboard”
✔ use shelf liners for a cleaner look
✔ install bright LED lighting nearby
Even a simple light upgrade makes the area look 10x more organized.
Step 12: Create a Mini Inventory List (Optional but Powerful)
If you want your Costco zone to feel next-level organized, do this:
Keep a small list on your phone or clipboard.
Inventory List Example
- toilet paper: 2 packs
- paper towels: 1 pack
- snacks: 3 bins
- detergent: 2 bottles
- canned soup: 12 cans
This helps prevent buying duplicates and wasting money.
Step 13: Add a Rolling Cart for Quick Transfers (Game Changer)
If your garage is far from your kitchen, a rolling cart is amazing.
You can load it up with:
- snacks
- drinks
- paper towels
- detergent
And roll everything inside in one trip.
It feels like you’re running your own mini warehouse (in a good way).
Step 14: Store Food Items Safely (Important!)
Since your garage can get hot or cold depending on the season, not all food should be stored there.
Safe Food Items for Garage Storage
✔ canned food
✔ bottled water
✔ sealed snacks
✔ dry pasta and rice
✔ sealed cereal boxes (better inside bins)
Food Items NOT Ideal for Garage Storage
❌ chocolate
❌ cooking oils
❌ flour (attracts pests)
❌ anything that melts or spoils easily
❌ open bags of snacks
Pro Tip:
Always store food inside sealed bins to avoid pests.
Step 15: Protect Your Costco Zone From Pests
This is super important.
Garages attract bugs and rodents, especially if food is stored loosely.
Pest-Proofing Checklist
✔ store food in sealed plastic bins
✔ avoid leaving cardboard on the floor
✔ keep shelves at least a few inches off the ground
✔ seal gaps near garage doors
✔ clean crumbs immediately
✔ don’t store open pet food bags
✔ use peppermint deterrent (optional)
Once you pest-proof it, your Costco zone becomes safe and worry-free.
Step 16: Keep a “Bulk Overflow Rule”
This rule will save you from turning your Costco zone into a new clutter zone.
Bulk Overflow Rule:
If it doesn’t fit on the shelf, you don’t buy it.
Because if you keep buying without space, you’ll be right back to piles on the floor.
A clean Costco zone means boundaries.
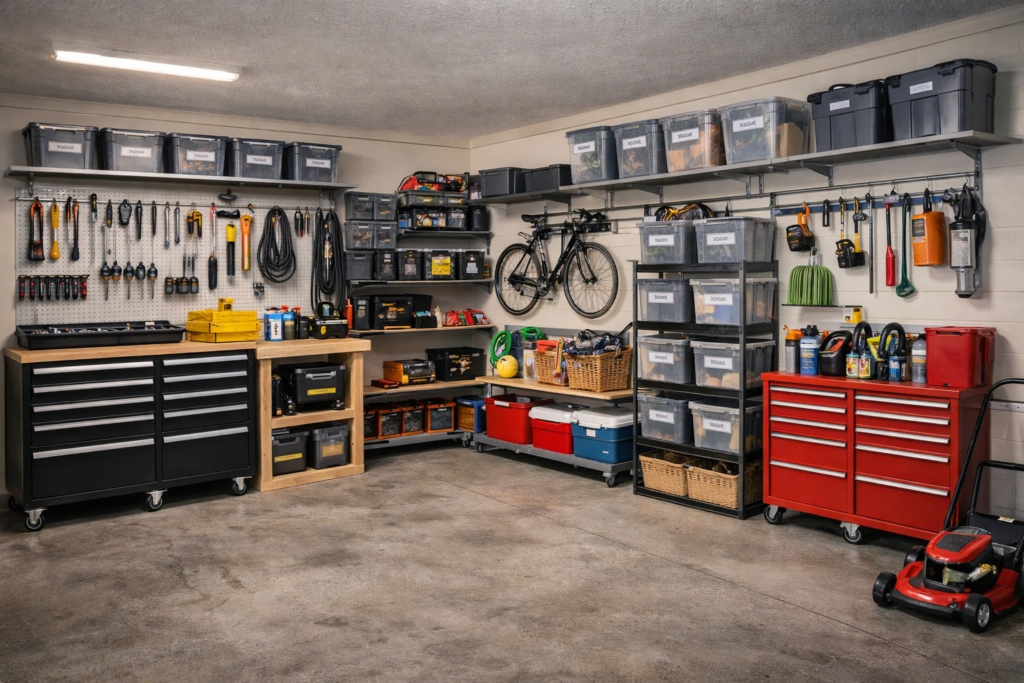
Best Costco Storage Zone Layout Example
Here’s a simple layout that works for almost any garage:
Shelf 1 (Left Side)
- paper towels
- toilet paper
- tissues
- napkins
Shelf 2 (Right Side)
- snacks bins
- canned food
- cleaning supplies
- toiletries
Bottom Shelf Area
- bottled water
- soda
- pet food
Corner Basket
- “Grab & Restock” items
This layout makes it easy to find everything fast.
Best Coordinating Items to Buy for a Costco Storage Zone
If you want the system to look professional, here are the best items to use:
Must-Haves
- heavy duty metal shelf rack
- 6–10 clear storage bins
- label maker
- baskets for snacks
- stackable crates for toiletries
- wall hooks for overflow bags
Nice Extras
- motion sensor LED light
- rolling cart
- shelf dividers
- plastic drawer unit for small items

Common Costco Storage Zone Mistakes to Avoid
Let’s save you from frustration.
Mistake #1: Leaving Everything in Cardboard
Cardboard looks messy and attracts pests.
Mistake #2: Mixing categories together
Snacks and cleaning products should not be mixed.
Mistake #3: Storing heavy items on the top shelf
This is unsafe and annoying.
Mistake #4: No labels
Without labels, the system falls apart fast.
Mistake #5: No restocking routine
If you don’t restock properly, you’ll still end up with pantry clutter.
How to Maintain Your Costco Storage Zone (Super Easy)
Here’s the good news:
Once it’s set up, maintenance is simple.
Weekly Costco Zone Reset (5 Minutes)
✔ straighten bins
✔ check what needs restocking
✔ move older items forward
✔ wipe shelves if needed
Monthly Costco Zone Refresh (15 Minutes)
✔ toss expired items
✔ update inventory list
✔ reorganize categories if needed
That’s it.
A little maintenance prevents chaos forever.
Final Thoughts: A Costco Storage Zone Will Change Your Life
Okay, maybe that sounds dramatic…
But honestly?
Once you create a Costco storage zone, your house feels instantly more organized.
Your kitchen stays clean. Your pantry stays manageable. Your bulk shopping becomes stress-free.
Instead of stuffing paper towels behind your sofa (we’ve all done it), you’ll have a clean, organized system that makes you feel like you have your life together.
And the best part?
It doesn’t require a remodel.
Just shelves, bins, and a smart zone layout.
So if you’re tired of Costco clutter taking over your home…
Create your Costco storage zone this weekend.
You’ll thank yourself every single time you unload groceries.
Quick Costco Storage Zone Checklist (Printable)
✔ Choose garage corner/wall
✔ Clear and clean the space
✔ Measure the area
✔ Install heavy-duty shelving
✔ Buy matching bins
✔ Sort items by category
✔ Store heavy items on bottom shelves
✔ Label everything
✔ Use FIFO (first in, first out)
✔ Restock kitchen from garage
✔ Pest-proof food storage
✔ Do a 5-minute weekly reset