Ever looked at your cluttered garage and thought, “I wish I had space for a proper workshop”? You’re not alone. For many homeowners, the dream of having a personal space to tinker, fix, build, and create seems just out of reach — especially when your garage is already tight on space.
But here’s the truth: you don’t need a giant garage or a massive budget to build a functional and inspiring workshop. With a bit of planning, smart design choices, and a few creative solutions, even a single-car garage can become your ultimate DIY haven.
This guide is your roadmap. Whether you’re a weekend woodworker, a car enthusiast, a home repair junkie, or someone finally ready to make their space work harder — this article will help you transform your garage into a workshop you’ll love stepping into.
Let’s roll up our sleeves and get started.
1. Why Your Garage is the Perfect Place for a Workshop
Your garage isn’t just a parking space — it’s an untapped goldmine for productivity. With a solid structure, existing power, and a door that can open for fresh air, it’s one of the most versatile areas in your home.
Benefits of a Garage Workshop:
- Privacy & Focus: No distractions from the main house.
- Easy Clean-up: You don’t mind getting a little dirty in the garage.
- Accessibility: Tools and supplies are just steps away from your front door.
- Noise Control: A better option than working inside your home.
- Expandable Options: You can add storage, lighting, and utilities as you grow.
Even if your garage feels cramped or cluttered now, with the right mindset, you can absolutely carve out a dedicated workshop area.

2. Assessing Your Space (Yes, Even a Small One)
Before buying tools or building benches, take a moment to truly understand your available space. It’s tempting to jump straight into shopping — but smart planning now saves you headaches later.
Take Measurements:
- Length, width, and height of your garage
- Measure floor space not occupied by your car, laundry machines, or storage
- Don’t forget door clearance, outlets, and window positions
Use painter’s tape or a chalk line to mark off zones temporarily on the floor to visualize potential layouts.
Bonus Tip:
Try using free tools like SketchUp or even a sheet of graph paper to sketch your space to scale. You’d be surprised how much easier it is to plan when things are visual.
3. Define Your Workshop Goals First
Your workshop should reflect how you plan to use it.
Ask yourself:
- What type of projects will I do most? (woodworking, electronics, painting?)
- How often will I use the space?
- What are the largest tools I’ll realistically need?
- Am I sharing this space with a car or other functions?
- What’s my starting budget?
This clarity helps you avoid clutter and wasted investments.
💡 Pro Tip: Start small. Your first garage workshop doesn’t need to be a full-fledged dream shop. Begin with the essentials — and grow it over time.

4. Designing a Smart Workshop Layout
Now let’s talk layout — the difference between chaos and creativity.
4.1 Divide the Garage into Functional Zones
- Work Zone: A clean, open surface (your bench) where the main action happens
- Tool Zone: Tool racks, drawers, or a pegboard near your bench
- Storage Zone: Shelves, bins, and racks for materials and supplies
- Safety/Ventilation Zone: Fan, fire extinguisher, dust control, etc.
4.2 Space-Saving Layout Examples
You don’t need a full wall or permanent fixtures. Some clever ideas include:
- Fold-down workbench that hides flat against the wall
- Mobile tool carts that slide under a bench
- Vertical pegboards that store hand tools in plain sight
- Ceiling-mounted shelves to free up floor space
(Related: 15 Must-Have Features for Your Dream Garage)
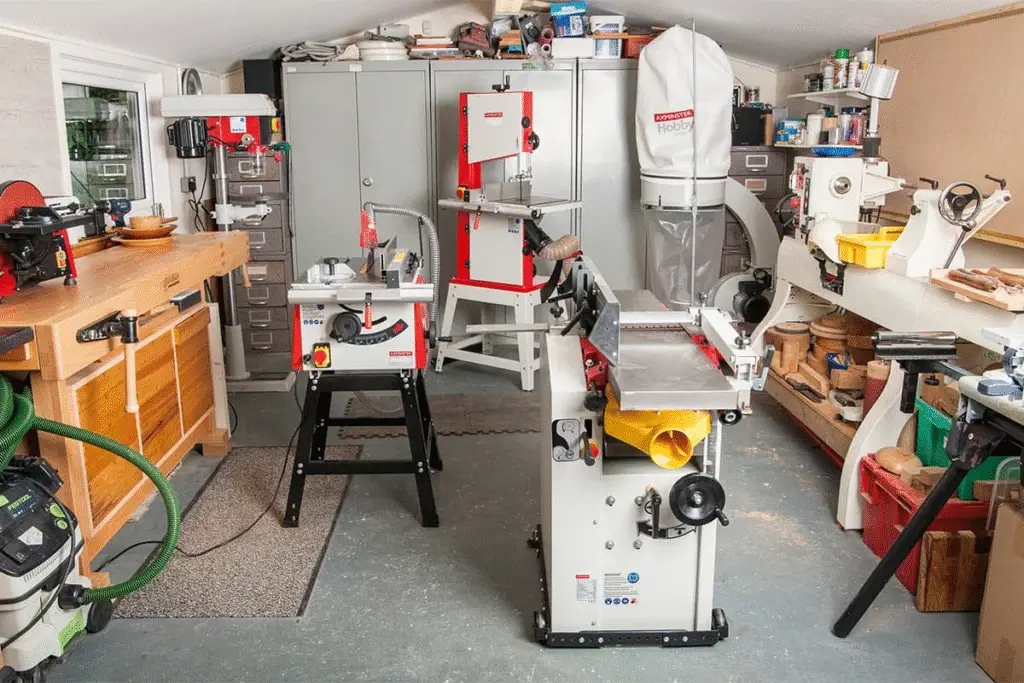
5. Must-Have Tools & Equipment for Small Garage Workshops
Start with versatile tools that punch above their weight.
Essentials:
- Cordless Drill/Driver
- Circular Saw (with a track guide)
- Jigsaw
- Clamps and Vice
- Shop Vac or Dust Extractor
Space-Saving Tips:
- Look for multi-functional tools (like a table saw that converts to a router table)
- Invest in foldable benches or stackable toolboxes
- Use battery-powered tools to avoid cord clutter
🎯 Pro Tip: Create a “first five” list of the most-used tools for your type of project — and organize them for instant access.
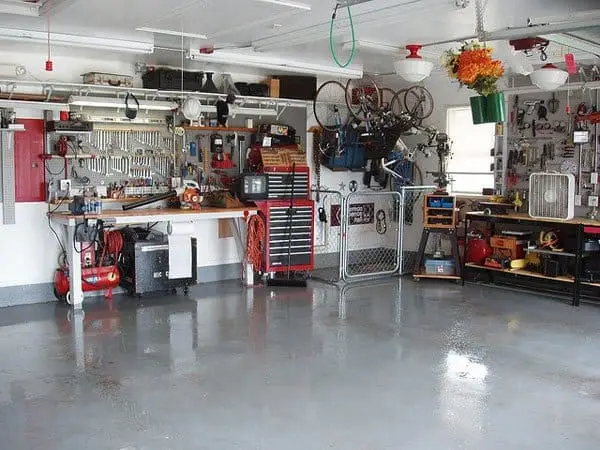
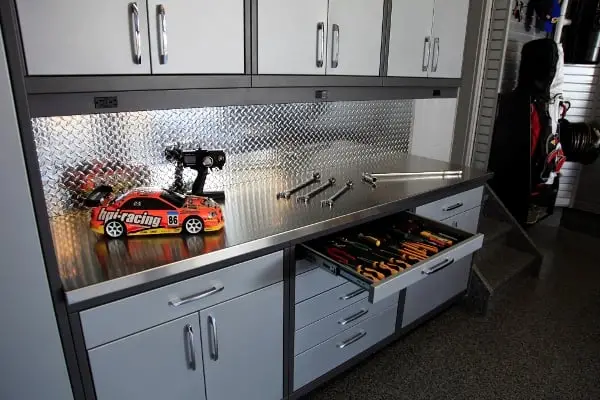
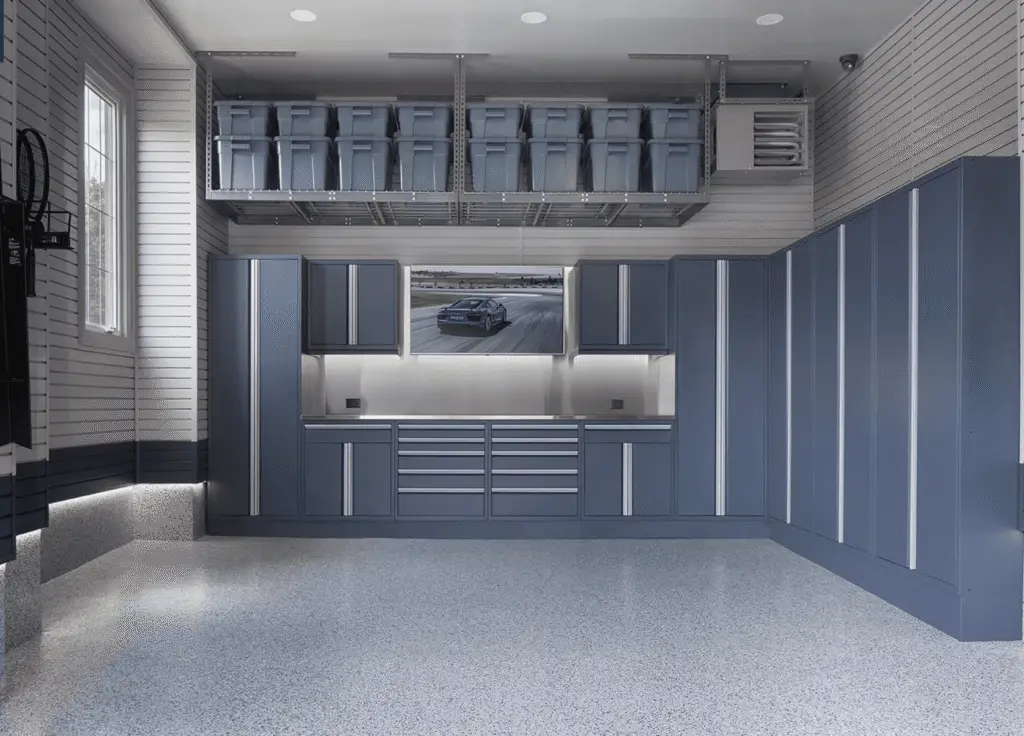
6. Smart Storage Solutions that Actually Work
Messy tools kill motivation. Clean tools inspire projects.
6.1 Wall Storage Ideas:
- Pegboards for flexibility and visibility
- Slatwalls for heavier tools and custom shelves
- Magnetic strips for metal tools — stylish and practical
6.2 Overhead Storage:
- Ceiling shelves for long lumber, seasonal items
- Use pulleys or hoists for heavier gear
- Add LED lighting underneath to save vertical space
6.3 Mobile Storage Options:
- Rolling carts for tools or paint
- Portable bins with handles
- Drawer organizers for screws, bits, and accessories
🧠 Mindset Shift: Every square inch of wall, ceiling, and under-bench space is an opportunity.
Power & Electrical Setup: Keeping Your Workshop Wired Right
No workshop is complete without a reliable power setup. But setting it up correctly — especially in a small garage — is key to safety and functionality.
Plan Your Outlets Wisely
- Count your power tools and work lights.
- Install multiple outlets around your bench and walls to avoid excessive extension cords.
- Consider dedicated circuits for high-power tools to prevent tripped breakers.
Extension Cords vs Permanent Wiring
Extension cords are tempting but can create clutter and hazards. Where possible, have a licensed electrician add outlets or use cord management clips to keep cords neat.
Lighting: Don’t Skimp
- Use bright, cool LED lights for task lighting.
- Overhead lighting should cover the entire garage evenly.
- Add adjustable task lights at your bench for detailed work.
Safety First
- Use surge protectors to protect your tools.
- Always check cords for damage.
- If you’re unsure about wiring, hire a professional.
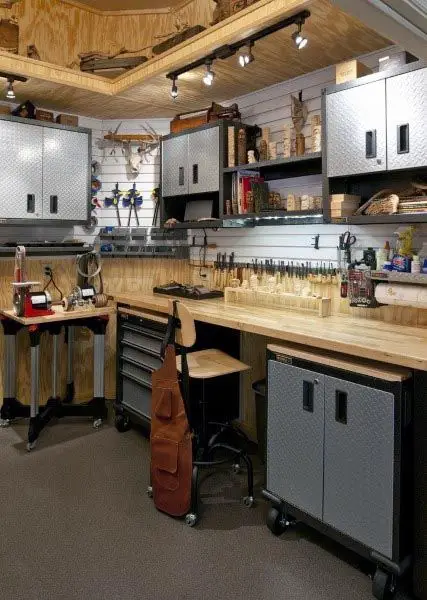
8. Workbench Ideas for Small Spaces
Your workbench is the heart of your workshop — the space where ideas turn into projects.
Wall-Mounted Fold-Down Benches
These are perfect for tight spaces. Fold it up when not in use, freeing floor space instantly.
Modular Benches on Wheels
Mobility means flexibility. Roll your bench aside to park the car or open floor space.
Repurposed Tables or Cabinets
Don’t overlook thrift stores or second-hand finds. A sturdy table or cabinet can be the perfect base with some customization.
Choosing the Right Size and Material
- Aim for a bench height around 34-36 inches — comfortable for most adults.
- Use hardwood or plywood tops for durability.
- Add a protective finish to resist stains and scratches.

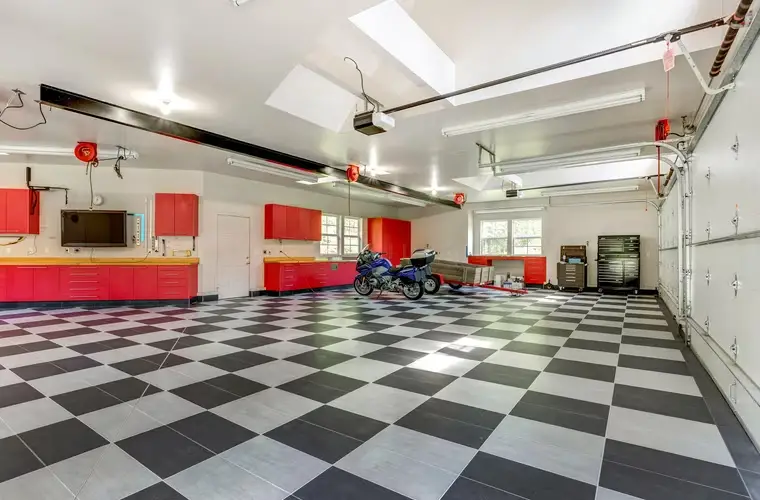
9. Flooring Considerations: Comfort & Durability Underfoot
Your garage floor takes a beating. Dust, drops, and standing hours can wear you down — literally.
Do You Need to Upgrade?
If your garage floor is just bare concrete, consider:
- Epoxy coatings: Durable, stain-resistant, and easy to clean.
- Vinyl tiles: Quick to install and comfortable.
- Rubber mats: Provide cushioning and reduce fatigue.
Anti-Fatigue Mats
Standing on hard surfaces can cause pain and fatigue. Invest in anti-fatigue mats for your work zone — your back will thank you.
10. Heating, Cooling, and Ventilation
To build comfortably year-round, you need to control the garage climate.
Heating Options
- Portable electric heaters: Great for winter but use with caution.
- Infrared heaters: Efficient and safe.
- Add insulation to walls and ceiling to keep warmth in.
Cooling & Ventilation
- Portable AC units or fans help in hot months.
- Ensure good airflow to clear fumes and dust.
- Install exhaust fans if you work with paints or chemicals.

11. Noise & Dust Control: Keeping Your Garage Workshop Neighbor-Friendly
Nobody wants to be the noisy neighbor or a dusty mess.
Soundproofing Tips
- Use foam panels on walls and garage doors.
- Add rubber mats or rugs on the floor to absorb noise.
- Consider weather stripping to seal gaps.
Dust Control
- Invest in a shop vacuum or dust extractor.
- Set up a dust collection system if you use saws or sanders frequently.
- Wear a respirator mask to protect your lungs.

12. Safety First: Fire, Chemicals & Tools
A safe workshop is a happy workshop.
Fire Safety
- Keep a fire extinguisher within reach.
- Store flammable materials in metal cabinets.
- Avoid clutter that can block exits or cause tripping.
Chemical Storage
- Use sealed containers for paints, solvents, and oils.
- Label everything clearly.
- Follow local regulations for hazardous waste disposal.
Child Safety
- Lock tools and chemicals out of reach.
- Teach children about workshop dangers if they visit.
Tool Security
- Use lockable cabinets or tool safes for expensive equipment.
- Keep sharp tools sheathed or covered.
Transition
Now that you’ve laid the groundwork with power, safety, and layout essentials, it’s time to dig into the finer details: lighting, organization, working with your car in the same space, and how to keep your workshop functional through the seasons.
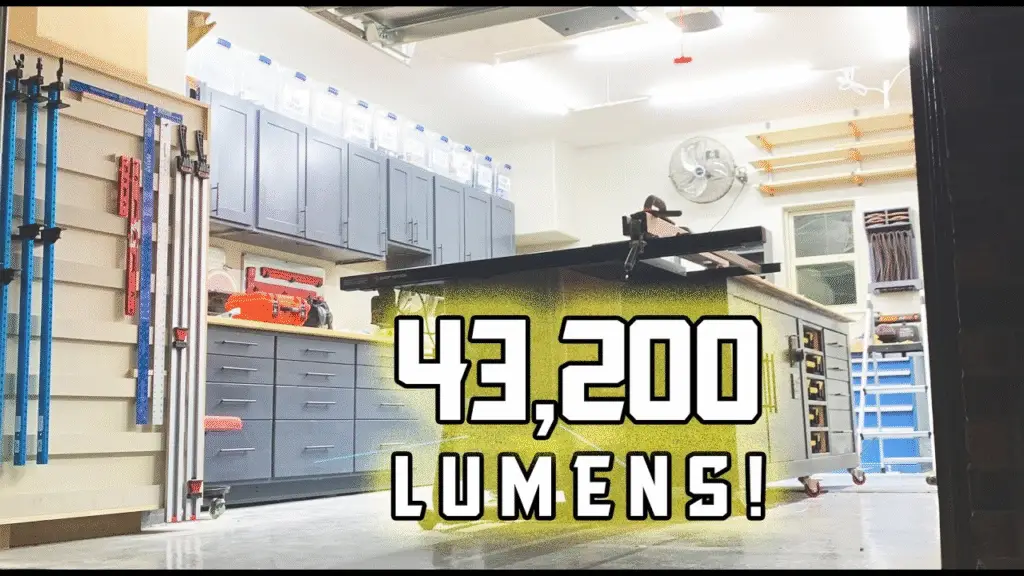
Lighting Up Your Workspace: See Every Detail Clearly
Great lighting can make or break your workshop experience. After all, how can you measure twice and cut once if you’re squinting?
Types of Lighting to Consider
- Overhead LED panels provide bright, even light that mimics daylight.
- Task lighting such as adjustable desk lamps or clamp-on lights lets you zoom in on intricate work.
- Under-shelf or strip lights add illumination without taking up space.
Placement Tips
- Avoid shadows by positioning lights directly above your workbench.
- Use multiple light sources to reduce eye strain.
- For painting or finishing work, color-corrected bulbs help you see true colors.

14. Maximizing Wall and Ceiling Space
When floor space is tight, vertical real estate becomes your best friend.
Wall Hacks
- Install hooks and brackets to hang bikes, cords, ladders, or extension cables.
- Use wall rails or tracks to hold tools and materials that you can slide in and out.
- Pegboards let you customize tool placement as your collection grows.
Ceiling Storage
- Store rarely used items like holiday decorations or lumber on overhead racks.
- Consider pulley systems for heavy or bulky gear, making storage effortless.
15. Organization Systems That Actually Work
Clutter kills creativity. Organization sparks it.
Simple Systems to Try
- Label everything – bins, drawers, shelves.
- Use transparent containers to see what’s inside at a glance.
- Follow the “First Reach Rule” — store frequently used tools within easy reach.
- Color-code your storage for fast sorting.
16. Sharing the Space: Workshop for Two
If you’re not the only one using the garage, a little planning can keep peace and productivity high.
Tips for Multi-User Workshops
- Create separate zones or benches.
- Use rolling carts to move your gear when someone else needs the space.
- Store tools in individual toolboxes for easy transport.
- Agree on clean-up routines to keep things neat.
17. Working Around Your Car
Many garages are dual-purpose — parking spot and workshop.
Smart Solutions
- Use slide-out or fold-down workbenches to clear space when the car arrives.
- Organize tools on rolling carts that tuck under the bench.
- Keep the floor clear with overhead and wall storage.
- Develop a quick clean-up checklist for when you need to switch modes fast.

18. Soundproofing Tips for Peace and Quiet
Working with power tools can get noisy — but neighbors don’t have to suffer.
Affordable Soundproofing Hacks
- Line garage doors and walls with acoustic foam panels or even heavy blankets.
- Use rubber mats on the floor to absorb vibration.
- Seal gaps with weather stripping to prevent sound leakage.
19. Budget-Friendly Lighting Upgrades
You don’t need to break the bank to have great lighting.
Easy DIY Ideas
- Use clip-on work lights that attach anywhere.
- Rechargeable magnetic LED lights can stick under shelves or to metal surfaces.
- Build simple light frames from PVC pipes or scrap wood for directed lighting.
20. Bringing Tech to Your Workshop
Make your workshop smart and connected.
Wi-Fi & Internet
- Use a Wi-Fi extender to boost signal strength in the garage.
- Consider a mesh Wi-Fi system if you have a large home.
Entertainment & Efficiency
- Bluetooth speakers keep your motivation up.
- Smart assistants like Alexa or Google Home can set timers or control music hands-free.
- Install a smart clock or weather station to keep you on schedule.
Transition
By now, your workshop is shaping up beautifully — well-lit, organized, and functional. But a great space also evolves with you. Next, we’ll look at inspiring real-life examples, seasonal tips, and maintaining your space so it keeps working for you — no matter what.
21. Small Workshop, Big Projects: Real-Life Examples
Seeing how others make it work is inspiring — and practical.
Example 1: One-Car Garage Woodworking Haven
A homeowner with a tight single-car garage created a fold-down workbench along one wall and used a rolling tool cart. They installed pegboards and ceiling racks to maximize vertical space, making woodworking possible without giving up parking.
Example 2: The Fold-Down Painting Station
An artist used a wall-mounted fold-down table with bright LED strip lights and a small rolling storage bin for paints and brushes. When not in use, the entire setup folded away, leaving the garage free for other activities.
Example 3: Dual-Purpose Laundry and Workshop Space
One family added narrow shelves above the washer and dryer for tool storage and used magnetic strips on metal cabinets for smaller hand tools. Their foldable bench folds right next to laundry machines, making the most of every inch.
22. Seasonal Adjustments: Adapting Your Workshop Year-Round
Your garage will feel different with every season, but your workshop can stay comfy.
Winter Warmth
- Add weather stripping to doors and windows.
- Use portable heaters with built-in safety shut-offs.
- Install insulation panels on walls and ceiling.
Summer Cooling
- Use portable fans or AC units.
- Work during cooler times of day (early mornings or evenings).
- Keep garage doors slightly open with screens to let in fresh air without pests.
23. Maintenance & Cleaning Hacks
A tidy workshop is a productive workshop.
Quick-Clean Tips
- Sweep or vacuum daily, especially after dusty projects.
- Use magnetic sweeper tools to pick up nails or screws.
- Wipe down benches weekly.
Saw Dust Control
- Position your shop vacuum near tools.
- Use dust bags or collectors on power tools.
- Consider an air filtration unit to reduce airborne particles.
Monthly Tool Checks
- Inspect cords for wear.
- Sharpen blades.
- Lubricate moving parts.
24. Budgeting Tips for a Small Workshop
You don’t need to empty your wallet to build an awesome space.
Where to Save
- Repurpose old furniture or cabinets.
- DIY storage solutions with plywood or pallets.
- Shop secondhand for tools and equipment.
Where to Splurge
- Quality lighting.
- Reliable power tools (they last longer and work better).
- Safety equipment.
25. Mistakes to Avoid When Setting Up a Small Garage Workshop
Learning from others’ errors saves time and money.
- Ignoring ventilation: Dust and fumes can be hazardous.
- Overloading electrical circuits: Can cause outages or fire hazards.
- Poor layout planning: Leads to cramped, inefficient work zones.
- Skipping safety: Fire extinguishers and first aid kits are non-negotiable.
26. Pros & Cons of a Garage Workshop
Pros
- Easy access and privacy.
- Customizable to your needs.
- Can increase home value with proper setup.
Cons
- Limited space if shared with vehicles.
- Temperature control challenges.
- Noise may disturb neighbors.
27. FAQs: Your Top Garage Workshop Questions Answered
Q: Can I still park my car in the garage?
A: Yes! Fold-down benches and mobile carts help maintain parking space.
Q: Is it legal to convert my garage?
A: Usually yes for workshops, but check local zoning laws for any permits.
Q: What’s the best workbench size?
A: Around 2-3 feet deep and 4-6 feet wide works well for most projects.
Q: How much does it cost to set up?
A: Basic setups can start around $300-$500, while full builds may run into thousands depending on tools and upgrades.
28. Small Workshop Checklist
Before you start working, here’s your ultimate checklist:
- ✅ Measure your garage space
- ✅ Define your workshop goals
- ✅ Design your layout with zones
- ✅ Set up power outlets and lighting
- ✅ Install a workbench (fold-down if needed)
- ✅ Organize tools with pegboards and storage bins
- ✅ Add heating, cooling, and ventilation
- ✅ Establish dust and noise control measures
- ✅ Maintain safety with fire extinguishers and proper chemical storage
- ✅ Plan for seasonal adjustments
- ✅ Keep cleaning and maintenance schedules
29. Inspirational Ideas from Pinterest & YouTube
If you want a daily dose of motivation, explore garage workshop boards on Pinterest and YouTube channels dedicated to DIY builds. Seeing transformations from cluttered garages to dream workshops sparks ideas and helps you avoid common pitfalls.
30. Final Thoughts: Yes, You Can Build Your Dream Workshop!
Building a workshop in a small garage might seem daunting, but it’s more achievable than you think. With smart planning, clever storage, and a bit of creativity, your garage can become your favorite room in the house — your personal hub for creation, repair, and relaxation.
Remember, the perfect workshop isn’t about how big it is but how well it serves you. Start small, stay organized, and keep tweaking until it feels just right.
Have you already built or started your garage workshop? What’s your best space-saving hack or tool? Drop a comment below — I’d love to hear your story!
If you found this guide helpful, please share it with fellow DIYers or homeowners dreaming of their own workshop.