If your garage has slowly transformed from a functional space into a chaotic dumping ground, you’re not alone. For many American homeowners, the garage becomes a catch-all for everything that doesn’t have a place inside the house—tools, seasonal decor, sports equipment, old furniture, and boxes you haven’t opened in years.
But here’s the good news: with the right strategy, your garage can become one of the most organized, functional, and even visually appealing spaces in your home. Think clean lines, labeled bins, wall-mounted systems, and that satisfying “Pinterest-perfect” aesthetic.
This guide walks you step-by-step through a complete garage storage makeover—from planning and decluttering to designing and installing smart storage solutions. Whether you’re a weekend DIYer or someone ready to go all-in, this is your blueprint.
Why Garage Organization Matters More Than You Think
A cluttered garage isn’t just an eyesore—it actively affects your daily life.
- Wasted time searching for tools or gear
- Lost money from buying duplicates of items you already own
- Safety hazards from tripping or falling objects
- Reduced home value if buyers see it as unusable space
On the flip side, a well-organized garage can:
- Increase usable square footage
- Improve workflow for DIY projects
- Protect expensive tools and equipment
- Create a calm, functional environment
Step 1: Define Your Garage Goals
Before you start pulling everything out, get clear on what you want your garage to become.
Ask yourself:
- Do I want a workshop?
- A home gym?
- A mudroom-style entry zone?
- A tool storage and maintenance hub?
- Or simply a clean place to park my car?
Most garages need to serve multiple purposes, so prioritize 2–3 main functions.
Pro Tip (From Experience)
Don’t try to make your garage do everything. The best transformations focus on clarity of purpose, not just aesthetics.
Step 2: The Full Declutter (Yes, Everything Comes Out)
This is the hardest part—but also the most important.
The Process:
- Empty the entire garage
- Sort items into 4 categories:
- Keep
- Donate
- Sell
- Trash
Key Rules:
- If you haven’t used it in 2+ years, seriously question it
- Broken items must be fixed within 30 days—or go
- Duplicates? Keep the best, ditch the rest
Garage Expert Insight
Most homeowners keep 30–40% more items than they actually need. Decluttering alone often solves half the storage problem.
Step 3: Deep Clean and Reset the Space
Once the garage is empty, take advantage of the blank slate.
What to Do:
- Sweep and power wash the floor
- Remove cobwebs and dust
- Check for mold or moisture issues
- Seal cracks in concrete
- Consider painting walls in a light neutral color
Optional Upgrade:
- Epoxy floor coating for a clean, durable, showroom look
A clean base instantly makes your garage feel more intentional and less like a storage afterthought.
Step 4: Plan Your Layout Like a Pro
This is where most people go wrong—they start buying storage before planning.
Divide Your Garage into Zones:
- Tool Zone – Workbench, pegboards, power tools
- Storage Zone – Seasonal bins, bulk items
- Sports & Outdoor Zone – Bikes, gear, camping equipment
- Entry Zone – Shoes, coats, bags (if attached garage)
Golden Rule:
Keep frequently used items at waist-to-eye level.
Less-used items:
- High shelves
- Overhead racks

Step 5: Choose the Right Storage Systems
This is where your garage transforms from “organized” to “Pinterest-perfect.”
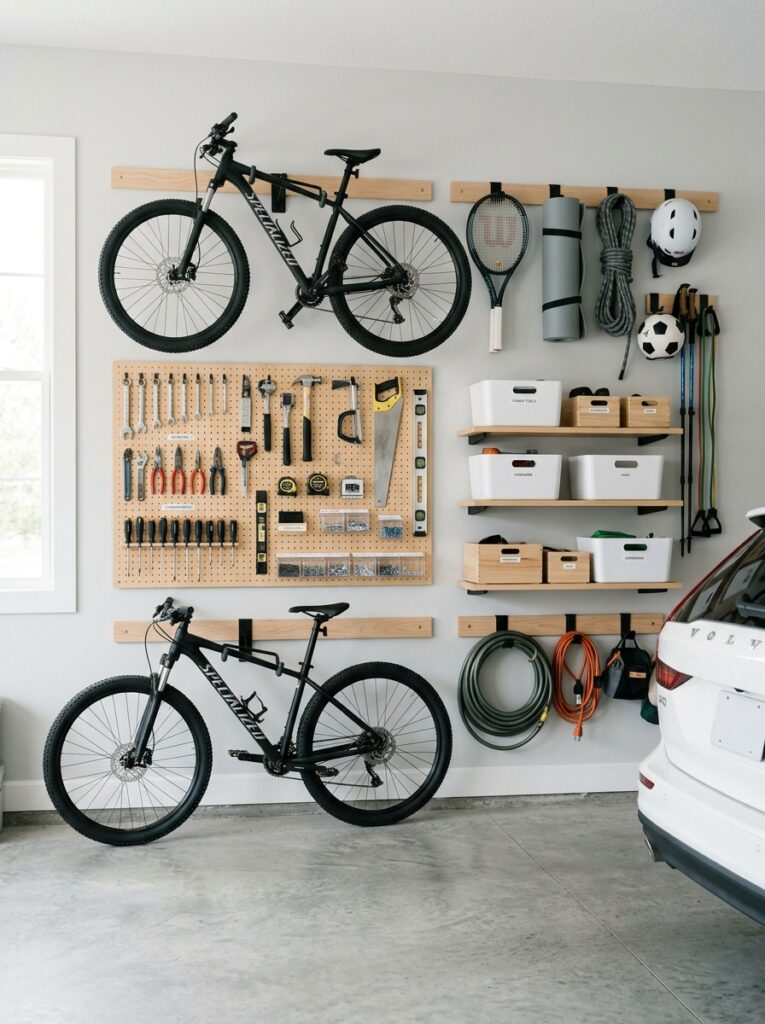
1. Wall-Mounted Storage
Wall space is your best friend.
- Pegboards for tools
- Slatwall panels for flexible storage
- Hooks for bikes, ladders, and cords
Why it works:
It keeps the floor clear and visually clean.
2. Heavy-Duty Shelving Units
Perfect for bins, boxes, and bulk storage.
Look for:
- Metal or industrial-grade plastic
- Adjustable shelves
- Weight capacity of at least 300–800 lbs per shelf
3. Clear Storage Bins (Game Changer)
Use transparent bins so you can see what’s inside.
Label everything clearly:
- Holiday Decor
- Camping Gear
- Car Supplies
Pro Tip:
Use uniform bins for that clean, aesthetic look.
4. Overhead Storage Racks
Ideal for:
- Seasonal items
- Rarely used gear
Install above garage doors or ceiling areas.
5. Cabinets for a Clean Finish
If you want that high-end look:
- Go for closed cabinets
- Hide clutter completely
Perfect for:
- Chemicals
- Paint
- Automotive supplies
Step 6: Create a Functional Workbench Area
If you do any DIY work, a dedicated workspace is essential.
Essentials:
- Solid workbench
- Task lighting
- Nearby power outlets
- Tool organization system
Upgrade Ideas:
- Built-in drawers
- Magnetic tool strips
- Fold-down workbench for small garages
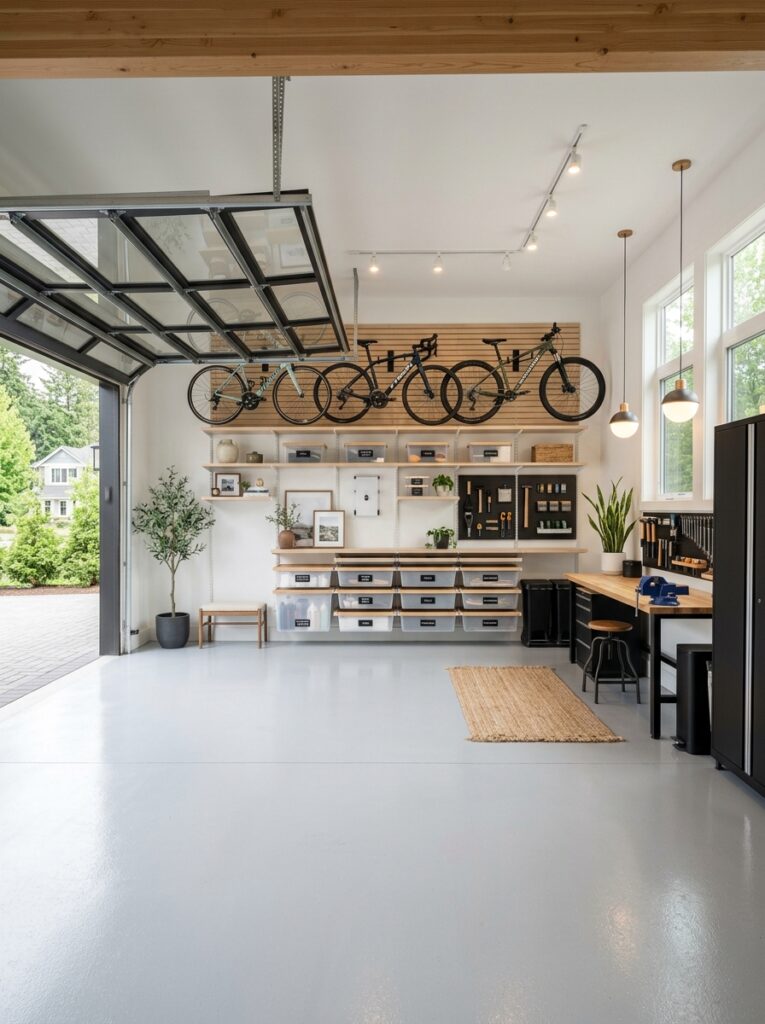
Step 7: Maximize Vertical and Ceiling Space
Most garages waste vertical space.
Smart Moves:
- Install shelves up to the ceiling
- Hang bikes vertically
- Use ceiling racks for storage
Expert Tip:
Keep a step ladder nearby to access high storage safely.
Step 8: Lighting Makes a Huge Difference
Lighting is often overlooked—but it’s critical.
Upgrade Your Garage Lighting:
- Replace dim bulbs with bright LED fixtures
- Add task lighting over work areas
- Use motion-sensor lights for convenience
Result:
Your garage instantly feels cleaner, safer, and more modern.
Step 9: Label Everything (Seriously)
A Pinterest-perfect garage isn’t just about looks—it’s about function.
Labeling Tips:
- Use bold, easy-to-read labels
- Keep naming consistent
- Label shelves AND bins
Why it matters:
You’ll always know where things belong—which keeps clutter from creeping back.
Step 10: Add Style (Yes, Even in a Garage)
This is what separates a basic organized garage from a “wow” transformation.
Easy Style Upgrades:
- Neutral color palette (black, white, gray)
- Matching bins and containers
- Clean-lined shelving
- Minimal visual clutter
Optional:
- Accent wall
- Rubber floor mats
- Decorative tool boards
Step 11: Maintenance System (The Secret to Long-Term Success)
Even the best garage can fall apart without a system.
Create Simple Rules:
- Put items back immediately after use
- Do a quick 10-minute tidy weekly
- Declutter every 3–6 months
One-In, One-Out Rule:
For every new item, remove one old item.
Common Mistakes to Avoid
1. Skipping the Declutter
You can’t organize clutter—you can only hide it.
2. Ignoring Vertical Space
Floor-only storage leads to overcrowding.
3. Buying Storage Too Early
Plan first, then buy.
4. Not Labeling
Leads to chaos returning quickly.
5. Overcomplicating the System
Keep it simple so it’s easy to maintain.
Budget Breakdown: What It Typically Costs
Here’s a rough estimate for a standard American garage makeover:
- Basic DIY setup: $200–$500
- Mid-range organized system: $500–$1,500
- High-end Pinterest-style garage: $1,500–$5,000+
Save Money Tip:
Start with essentials, then upgrade over time.
Real-Life Transformation Example
Before:
- Boxes piled everywhere
- No clear zones
- Tools scattered
- No parking space
After:
- Wall-mounted tool system
- Labeled bins on shelving
- Overhead seasonal storage
- Clear floor and workspace
Result:
A garage that’s not just organized—but enjoyable to use.
Final Thoughts: Your Garage, Reimagined
Transforming your garage doesn’t require a massive budget or professional help—it requires a clear plan, consistent effort, and smart storage choices.
The goal isn’t just to “clean up.” It’s to create a space that:
- Works for your lifestyle
- Saves you time
- Reduces stress
- And yes—looks incredible
Once you experience a fully organized garage, you’ll wonder how you ever lived with the clutter.
Quick Action Checklist
- Define your garage goals
- Empty and declutter everything
- Clean and prep the space
- Plan zones and layout
- Install wall and vertical storage
- Add shelving and bins
- Label everything
- Maintain weekly