A mobile platform called a scissor lift is used for raising objects and persons. Cross-hatched beams that move like scissor blades are used to raise and lower the platform. Because their lifting system only travels vertically, scissor lifts are not considered aerial lifts by OSHA, but rather mobile-supported scaffold work platforms.
Any operation involving elevated workstations, such as hanging signs, installing light fixtures, working on ceilings, or cleaning duties, can be aided with scissor lifts. They are also helpful for outside tasks like power line maintenance, tree pruning, and building.
Uses of Scissor Lift:
Elevated work platforms, or EWPs, are used in many different types of work surroundings, such as movie theaters, indoor warehouses, and building sites.
- Framework Installation:
Scissor lifts are commonly utilized for elevated tasks in facilities with high ceilings, such as schools, hospitals, hotels, and industries. The raised platforms can be used by laborers to install or replace HVAC pipes, cables, and overhead lights. Scissor lifts can also be used for building, drawing, and repairing damage to high walls or ceilings.
- Repairing Electricity Cables:
Scissor lifts can be a wonderful option for maintaining and repairing electricity lines because of its excellent stability and safety features. Workers and equipment are raised to the electricity wires by the elevating work platform so they may do repairs.
- Banners that Suspend:
Workers may secure indoor and outdoor signage with the aid of scissor lifts. They can be used for business reasons, including hanging signs for retail stores, or by job sites to post messages alerting walkers to impending work.
- Upkeep and Repairs:
Any service or repair job that calls for an aerial work platform can be assisted with scissor lifts. Heavy equipment inspections by manufacturing personnel, pipe and air conditioning unit inspections by HVAC professionals, and ceiling damage repairs by service technicians are just a few uses for them.
- Warehousing:
Scissor lifts are used in warehousing for a variety of purposes. Inventory tasks, such as carrying and removing containers and moving and removing bulky items from shelves, can be safely streamlined with scissor lifts. Other common jobs in the storage facility that scissor lifts can be used for are hanging signage and replacing bulbs.
- Capturing and Documenting Experiences:
Additionally, scissor lifts are used in creative projects. Scissor lifts, for instance, might assist filmmakers and photographers in capturing an event from an unusual perspective in the media or film industries. They can also be used by painters who require a boost for large-scale pieces like towering statues or canvases.
Types of scissor lifts:
While numerous employees may be raised to high heights using both electric and rough-terrain scissor lifts, that is where the parallels end. The variations between these two kinds of scissor lifts are discussed below.
- Electric scissor lift: Perfect for inside spaces with smooth things, electric scissor lifts are quiet, agile, emission-free devices. They are well-suited for tasks such as building servicing, light setup, and glass washing.
- Rough-terrain scissor lift: These kind of lifts are excellent for outside use in development and industry. These four-wheel-drive vehicles are suitable for projects involving rough terrain or off-road travel.
- Crawler scissor lift: Crawler scissor lift, also known as tracked scissor lifts, are a type of aerial work platform that utilizes continuous tracks instead of wheels. These tracks provide several advantages over wheels, particularly when working on uneven or soft terrain.
How Much Higher Can a Scissor Lift Go?
Scissor lifts are available in various capacities, with the standard range of elevation being 19 to 50 feet. While larger types have a higher weight capacity but have fewer maneuverable, compact scissor lift variants are lighter. A 50-foot scissor lift, for instance, is capable of lifting 2,250 pounds.
How to Select a Lift With Scissors?
The sort of workspace you will be in, the type of task you will be performing, and the lift height (both platform height and lift capacity) all play a role in selecting the best scissor lift for your worksite. Keep the following things in mind when selecting a scissor lift:
- Working height:
Consider your job’s height requirements before setting your working height. You have several possibilities because scissor lift heights normally range from 19 to 50 feet.
- Services size:
Next, consider the size of the platform that you will require. Though platforms are available in regular sizes, an extended platform is an option. Make sure to modify your calculations to account for larger platforms if your work calls for them in order to maintain a balanced load.
- Environment type:
The selection of lift will be influenced by the climate and topography of your job site. For instance, you could require an emissions-free electric lift with non-marking tires if you’re operating indoors. A four-wheel-drive model can be your best option if you require a scissor lift for use outdoors on uneven terrain.
- Ability to load:
Lift capacity is an additional important factor. You must take into consideration the items, equipment, and personnel that the lift must hold. You might wish to seek for a large-duty scissor lift if you intend to transport huge cargo or several workers.
- Work project:
Lastly, consider the kind of task you have to complete. A higher lift platform might be needed for roof work, whereas in a warehouse, mobility might take precedence above elevation.
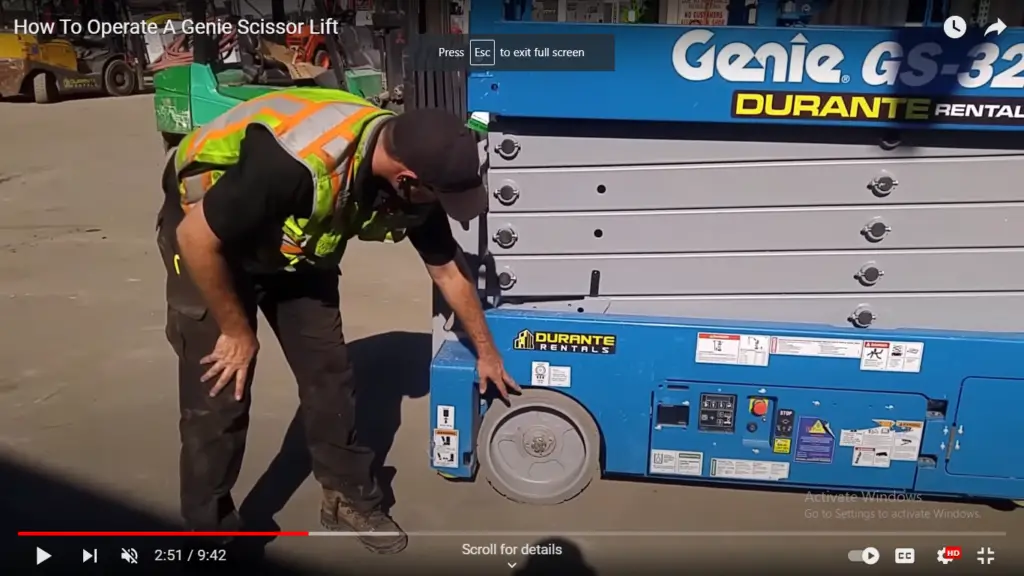
Checks before you operate the lift
Tires
I want to start out by saying that each one of the pins starts off with having a c clip. We want to make sure that those are properly installed. We also want to ensure that there are no missing chunks out of the tires; even if the tread is worn down, that’s okay as long as the equipment is level and provides good stability.
Battery
We want to make sure that the battery is charged enough for our operation. Go ahead and open it up, and even if the batteries are indicating low, one of the things is if it’s low on battery fluid, it won’t hold a full charge. So it might indicate that it’s fully charged, but it’s really only at about 50% capacity. So you want to double-check and make sure that they’re topped off with distilled water. We also want to make sure that all the battery terminals are properly secured and connected, and there’s not an excessive amount of corrosion on them.
Control Panels & Valves
Move over to reach out control panels and control valves. We want to make sure that those are not leaking any fluid at all. Make sure that the electrical connectors are connected, and we’re going to check the back tire, make sure it’s not missing any chunks or anything out of it. Make sure that the Cotter pins are installed, torque stripe is there, and once again, make sure the VC Clips are installed on this side.
Railings
Notice the middle ones have bolts that go all the way through; we want to make sure that they’re installed and the nuts are tight. As we’re coming around, we’re making sure that the railings are nice and straight and they’re not going to fall off while we’re operating; make sure all the nuts and bolts are nice and tight.
When we come to this side, we’re going to make sure that there’s no pinched hoses or anything like that; it’s immediately invisible to us. A couple of them happen to have plastic spacers between them, so it’s not metal to metal contact.
Hydraulic pump
You can then pop open the panel at side and we want to make sure that the hydraulic pump is not leaking, make sure that the motor, the wires are connected and secured properly, and make sure that the hydraulic level tank is between its minimum and its maximum.
Make sure that the last tire is in good solid condition, and that any time we’re operating equipment, we want to make sure that it operates functions properly, so we want to make sure everything functions properly at the base.
How to operate?
First, we want to make sure that our selector switch is selected to the right to indicate that we want to operate from the base station down here. Anytime we want to make a movement, we need to press the power button and then either up or down.
Notice that when we go down, you get the audible beep for the security warning to alert others around, so let’s go ahead and raise this lift up, get about 10 ft or so in the air, enough that it separates everything to get an idea of what’s there.
We do have a level sensor that’s down there; if it gets out of level, it’s going to freeze the equipment. We also have the horn down here; we want to make sure that the hoses that are going to the cylinder are intact and not leaking while it’s up.
Make sure any of the hoses or wires that are going up to the top don’t look like they’re getting pinched or binded in any sort of way.
The other thing that we really want to make sure is we don’t want anybody stuck up in the air not able to get down, so before we go up in it, we want to make sure that we test the emergency release by simply pulling it out and making sure the hydraulic fluid bleeds off and the scissor comes back to normal level.
Once this is done, we’ll start these about 6 ft up there, press the power button, and make sure it lowers back down. That basically completes all the function checks of everything on the ground.
We can then switch it over to make sure the control is all the way to the left and we have controls up in the basket, and then we can walk around, go up, and we’ll test all the controls from the basket as well.
You’re operating your scissor Boom for the first time; you always want to take the time to go through and make sure that you read the operator’s manual so that you know the full operation and limitations of the equipment.
Check the manual
In all of our scissor lifts and all of our booms, we have special cases that are weather protected that have the operator’s manual inside.
Take the time to go ahead and read it, but as a general function, anytime you’re going to start using the scissor lift, we’ve already done the walk around on the bottom, make sure everything is safe and secure.
Once we find the position that we’re going to be in and our overhead space is clear, we want to make sure that the emergency stop switch is up and then we want to make sure that especially with this scissor lift, it’s equipped with additional Outriggers; it’s very narrow so in order to make sure that those are fully extended and that the scissor is on a level surface.
We’ll make sure that we press down on the Outrigger button at the same time that we squeeze the trigger and pull the handle to the back; you’ll start to hear the Outriggers go out and then the platform will start to move around; we want to hold down the buttons, the trigger, and the handle until the platform stops moving and there’s a loud solid audible heat that indicates that the scissor is now stable and level.
Drive function & Raise function
At that point in time, if we’d like to go up in the air, we’ve got two functions: we have the drive function on the right and the raise function on the left; we’ve got six lights indicating that we have a full charge on the battery.
We want to go up in the air now that our Outriggers are extended; we also have four green lights on showing that they are extended; we want to click the raise button; at that point, we can squeeze the trigger and it’s proportional.
If you push it forward a little bit, it’ll go up slowly; if you push it forward a lot a bit, it’ll go up faster; continue to hold it until you’re up to the height that you prefer and then you come back to Center and you let go; you can then start to perform your work.
If you want to drive, remember that your Outriggers are down; you’re not going to be able to drive; we suggest only driving if you’re on a smooth flat surface; if you’re on any kind of unimproved surface, Outriggers must be out and down.
When you’re ready to come back down, notice there’s no function in the controls; that’s because it doesn’t know if we want to drive or raise and lower. So, we want to make sure that we select raising lowerable to drive.
We suggest only driving if you’re on a smooth flat surface; if you’re on any kind of unimproved surface, Outriggers must be out and down.
When you’re ready to come back down, notice there’s no function in the controls; that’s because it doesn’t know if we want to drive or raise and lower. So, we want to make sure that we select raising lower, pull the trigger, and then remove it back. Coming down is not as proportional; it’s not as controlled, so don’t be scared when it jerks around.
Once we’re ready to raise the Outriggers back up, just press the button, squeeze the trigger, push the handle forward, and the platform will begin to move as the Outriggers come back up and it comes back to its natural surface. Hold it down; there is no beep or indication that they’re fully retracted, but it will stop moving.
Drive feature
At that point, we can then select the drive feature. We always have to squeeze the trigger. There are two buttons on the top of the joystick; the left button turns the wheels to the left, the right button turns the wheels to the right. Always keep in mind because the joystick is movable; it can be facing in different directions. Make sure you know which direction you’re going. If you have to, just slightly glance over the edge and take a look at where your tires are.
As you turn it to the right or the left, now you can turn and move at the same time. We move forward by pushing the joystick in the forward direction. Anytime between movements, a lot of times it might reset if you stop moving for a second, so make sure that it’s selected. It’ll show a little circle over the type of movement that you’re going to be doing.
Then we can squeeze the trigger and push forward, and it will begin to drive forward. You can also tap the button left and right, and as you can see, we can start to turn left and turn right.
Now, the other thing is if we want to, now that we don’t have Outriggers out, we’re on a fairly level surface, we can push the raise and extend button. We can raise up into the air; we’re only going to take it up about 10-15 ft, bring it to a stop, and then you can select the drive function which will allow us to move while we’re up in the air but the amount of movement and the speed at which it moves is drastically reduced so the higher up you go, the slower it will move to maintain its stability.
When you’re ready to go back down, simply press the down button and be again to go back down. It’s always good to check it’s always good to check and make sure that all these functions work before you get all the way up in the air. When you’re done, make sure that you hit the emergency stop button and turn the switch off so that the battery is going to continue to.
Conclusion:
A scissor lift is a mobile elevating platform used for lifting objects and personnel vertically. It finds applications in various industries, including construction, maintenance, and cinematography. Electric scissor lifts are suitable for indoor use, while rough-terrain variants are ideal for outdoor environments. Heights range from 19 to 50 feet, and they vary in weight capacity. The appropriate lift selection depends on factors such as the work environment, required height, platform size, and load capacity.