Easy Ikea Shoe Cabinet Hack
We recently moved into a new apartment, and it is much smaller than our previous rental – so cue all of the DIY organization projects. Starting with this easy Ikea Shoe Cabinet Hack.
I absolutely love our new place, but there are still a few pain points, and the first thing I wanted to tackle was the lack of an entryway. I know that this is relatively common these days, especially for new builds, but I feel like some semblance of an entryway is pretty necessary. Thankfully, we do have a nicely sized coat closet at the end of our entry-hallway, but we wanted some kind of storage cabinet/table close to the door as well – and we’re working with limited space.
Avoid the IKEA Knobs – And Add Some Coastal Vibes
So after some Pinterest searching for entryway inspiration, I came across the infamous Ikea Shoe Cabinets. I feel like most people have seen or heard of them these days, because they are just really awesome and practical. After a fun visit to Ikea, we decided to go with the Hemnes cabinet, as we liked this style the best, and it was the perfect height to go with the round mirror we have (also from Ikea).
I should clarify that I fell in love with the Hemnes cabinet because of its practicality – not its knob placement. I knew even before leaving the store that we would definitely be changing the knobs. They were pretty simple and boring, but also in a weird place (a quarter of the way down the drawer). So thankfully I found this post by House Tweaking, which involved replacing the regular Ikea Hemnes knobs with DIY leather pulls from a belt.
Our super narrow entryway with the plain Hemnes cabinet (pre DIY)
Change Up the Style – Add a Stained Pine Board
Once we built the cabinet according to the Ikea directions (minus the knobs), I decided that it was just a little too white for my liking. So we ended up replacing the top board of the cabinet with a stained pine board to tie it in with our other wooden elements we had purchased for the entryway. Plus it made it more of a homey + welcoming space with some modern bohemian vibes.
-
Supplies:
- Ikea Hemnes Cabinet
- Wireless drill
- A leather belt for a DIY version, or leather pulls like these
- White Spackling with a putty knife
- 1 10″x1″ in board for the new top
- Palm sander
- Stain in the colour of your choice. I used a combination of Minwax Early American and Minwax Special Walnut
- Foam stain brush
- Hammer
- Screws (in your choice of colour – I used black, but I wish I used gold)
- White paint
- Paintbrush or Foam brush
- Wood Glue or L brackets to reattach the top (Optional)
Step 1: Construct Your Cabinet
The first step of this DIY was to build the Hemnes cabinet according to the instructions, but to ignore the step where you fasten the top board to the rest of the structure. You can still rest the top on the cabinet if you don’t quite have the new board sanded and stained. The next step is to decide where your shoe cabinet will go, and fasten the cabinet to the wall according to the instructions.
Step 2: Cut + Attach the Leather Pulls
I wanted the leather pulls to pop out slightly more, so I decided to screw them in at the top of the drawer, rather than at the front. The belt and the drawers were slightly hard to drill through at the same time, so I decided to pre-drill the pull holes into a scrap piece of wood first.
Step 3: Fill the Holes
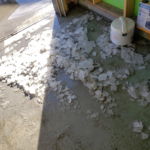
Using a scraper, apply a small amount of the plaster over the knob hole and smooth out until you have a flat surface. Once you’re happy with the coat, leave it to dry for about 15-20 minutes. This may take a few coats to ensure everything is evenly spread. If some plaster dries on the area around the hole, that’s totally ok! It sands or scrapes off very easily. Once it looks like a flat surface, then it’s ready to paint.
Step 4: Paint Over the Plaster
We had a bunch of cans of wall paint that our landlord left in our garage, and the colour was very similar to the cabinet colour, so we did a quick thin coat over where we applied the plaster. I recommend doing a few coats so that it really covers the holes and blends into the cabinet colour.
Step 4: Prepare the Wooden Board
Cut the wooden board to fit the top of the cabinet. We decided to have the board be slightly larger than the width of the cabinet, so it ended up being 8.5″. We used a table saw to cut it down to the size we wanted. Sand the board and clean it off before you stain. Using a foam brush, stain the board in your preferred stain. Depending on how dark you want your board, this might take two coats of stain. I really like Minwax Special Walnut stain, so I started with a coat of that, but it didn’t really match the tone of our ikea mirror, which has a red tinge to it, so we mixed special walnut with a little early american! I’m really happy with the colour we ended up with!
Once the stain is dry, you can attach the top using wood glue, or L brackets from the inside. I found that the new top was heavy enough to just sit on top of the unit without needing to be fully attached.
Final Touches and Decorations
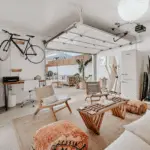
Now fill your cabinet and style your space to your heart’s content. We added the Ikea round mirror, a runner, some hooks, and a small stool. I also love the look of this little plant with my DIY abstract face sculpture. We’re so happy with the end result! I absolutely love how practical the space is. We can fit quite a few of our go-to shoes in three of the drawers, and then we use one of them to keep dog treats, bags, and other goodies in. I also love that I have another surface to style, so I’ll probably be switching up what sits on the board very often.
Need to Spice Up Your Own Entryway?
Pin for later, and make sure to tag @lavender_julep on insta with your own Hemnes hacks. Cheers!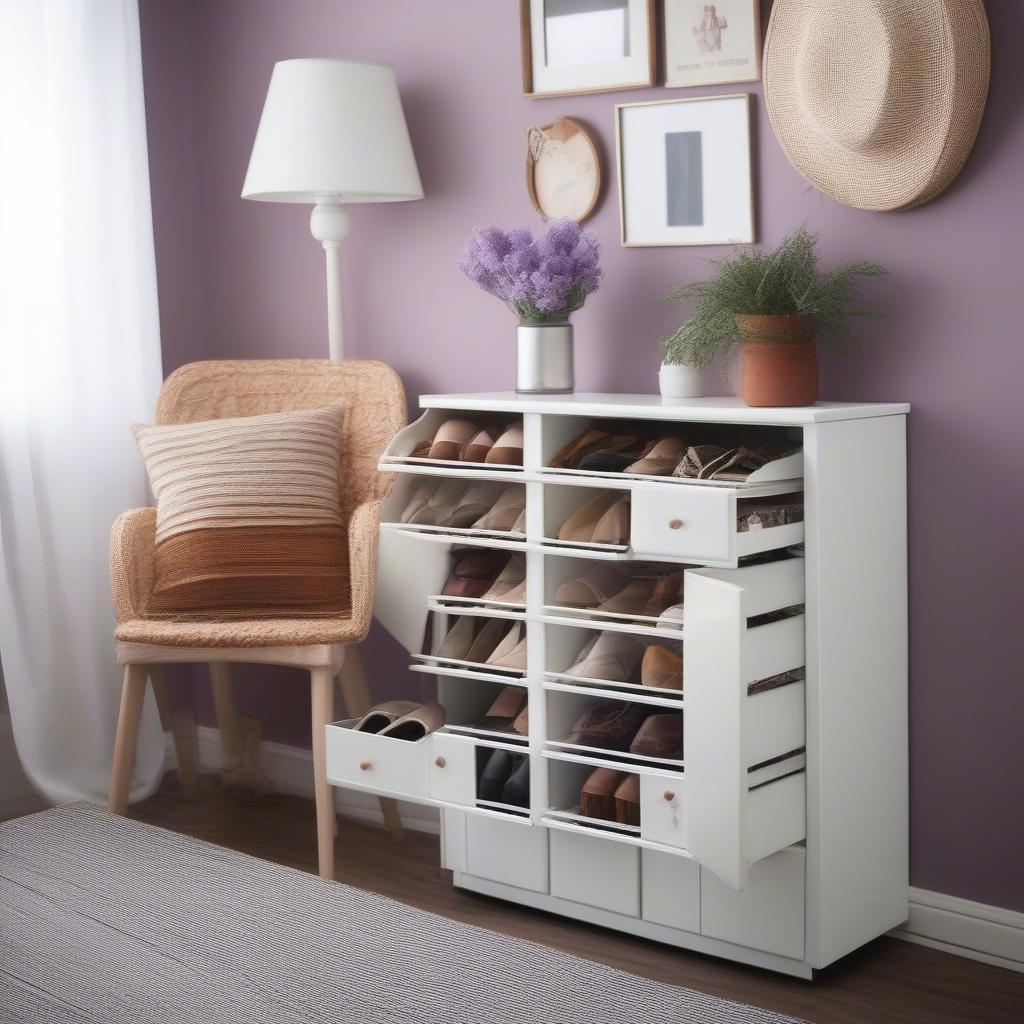 What is the main idea of the Ikea Shoe Cabinet Hack? The main idea is to customize an Ikea Hemnes shoe cabinet by replacing the factory knobs with leather pulls and adding a stained pine board to the top for a more personalized and stylish look.
Why did you choose the Hemnes cabinet? The Hemnes cabinet was chosen because of its practicality and the fact that it complemented the height of an Ikea round mirror.
What materials are needed for this project? Materials include an Ikea Hemnes cabinet, a leather belt or leather pulls, white spackling, a wooden board, a palm sander, wood stain, a foam stain brush, a hammer, screws, white paint, a paintbrush or foam brush, and optionally wood glue or L brackets.
What was the purpose of adding the stained pine board? The stained pine board was added to make the cabinet blend with other wooden elements in the entryway and to add a homey, welcoming touch with modern bohemian vibes.
How did you adjust the front of the cabinet? The front of the cabinet was adjusted by replacing the plain knobs with leather pulls, which were screwed in at the top of the drawers.
Are any additional tools required for this project? A wireless drill is required for drilling into the leather and cabinet for the leather pulls, and a table saw is recommended but not necessary for cutting the wooden board to fit the cabinet.
What can be stored in the shoe cabinet after the hack? After the hack, your go-to shoes can be stored in three of the drawers, and one drawer can be used for items like dog treats, bags, and other small items.
Can the cabinet be painted instead of staining the top board? While staining the top board was the approach in the hack, the cabinet can be painted if you prefer a painted look instead of a stained one.
What is the final look of the entryway after the hack? The final look includes the modified Hemnes shoe cabinet, an Ikea round mirror, a runner, some hooks, a small stool, and a plant with an abstract face sculpture, creating a practical and stylish entryway.
Do you recommend this project for others? While not explicitly stated, the article implies a recommendation based on the enthusiasm described towards the final result of the project.