Slump test is a laboratory or site experiment civil engineers perform to assess the workability of the concrete. With such, the test is also referred to as slump cone test or concrete workability slump test. During concrete pouring, you need to check the uniform quality of concrete in terms of consistency and workability. Fresh concrete testing is a very important part and parcel to ensure quality construction.
Do you know the flow-ability or workability is an important property of concrete mixture? Yes! It is an important requirement for all projects worldwide. Anyhow, concrete slump testing offers a real-time and on-site procedure to determine the quality of fresh concrete.
A concrete with slump values too low or too high need adjustment before placing.

Benefits of Slump Test Experiment
There’re many benefits of slump test experiment.
- It is a low cost test, doesn’t need some expensive equipment at all.
- The sampling of material is simple and easy.
- Plus, it provides you immediate results.
Standard of Slump Test Experiment
The slump test is standardized by many agencies throughout the word. In United States, engineers perform this test as per ASTM C143 standard and AASHTO T119 and AASHTO BS1881. If you’re from India, you will follow IS: 1199-1959. Whereas for Europe and Britain, you’ll follow EN 12350-2.
Workability of concrete slump test
Concrete workability depends on a lot of factors as I’ve already discussed in an article here. The slump value varies depending on the factors like:
- Water cement ratio – the water content is a basic component that causes hydration reaction in cement. The slump value increases with increase of water cement ratio but only upto a certain limit.
- Properties of materials – Like the fineness of cement, aggregate size and distribution, moisture content, temperature, and amount of cement content. The size and texture of aggregate also impact workability and slump values.
[su_box title=”Do you know” box_color=”#0092c4″ radius=”9″ id=”social_definecivil”]Do you know: In summers, project managers ensures to cover the aggregate stockpile to avoid overheating of the concrete aggregate.[/su_box]
- Mixing method include method for batching of concrete, mixing, and method of transportability.
- Admixtures – the amount of air content or usage of air-entraining agents.
- Temperature of concrete or aggregates
- The efficiency of laboratory person in sampling of concrete and slump-test cone condition.
- Time lapsed after batching of concrete.
Apparatus and Equipment required for Slump Test Experiment
It is very important that you have your apparatus clean and in good condition. The apparatus you need to perform slump cone test is as follows:
- Slump Cone: It is a cone with diameter of 8 inches at the base and 4 inches at the top with height of 12 inches.
- Base plate: A rigid base plate with bolt-on clamps to hold the cone during testing. You’ll place the slump cone on top of the base plate. Mostly we prefer to use base plate with handle because it makes it easier to remove or measure the slump value.
- Tamping rod: That is just a steel rod if 0.625 inches in diameter and 24 inches long.
- Measuring tape: A measuring tape will be used to measure the slump value.
- Trowel: you can use it to fill the cone with concrete sample
- Funnel: This will assist you with the filling of concrete.
Relationship between workability and slump
Here’ is a table how slump and workability are related to each other.
[su_table responsive=”yes”]
| Workability | Compacting Factor | Slump (mm) |
| Very Low | 0.78 | 0 – 25 |
| Low | 0.85 | 25 – 50 |
| Medium | 0.92 | 50 – 100 |
| High | 0.95 | 100 – 175 |
[/su_table]
How to do a concrete slump test?
To avoid error and problems during the test, it is important to make preparations prior. You need to clean the mold, baseplate, and all other testing equipment to reduce the friction. Plus you have to ensure a flat and level surface for the testing that is free of vibrations.
Now here’s the procedure of the concrete slump test:
- Apply the de-molding oil inside the slump cone after cleaning.
- Take a sufficient quantity of concrete sample by using trowel and fill inside the cone. You will fill the mold with concrete sample in three equal layers.
- Each layer should be tamped uniformly with 25 strokes of rounded end steel rod. Be sure to penetrate the tamping into the underlying layers to ensure uniformity.
- Once the mold is full, you can remove the excess concrete from the top using trowel or straight edge.
- Clean the mortar or water from the base plate leaked during filling.
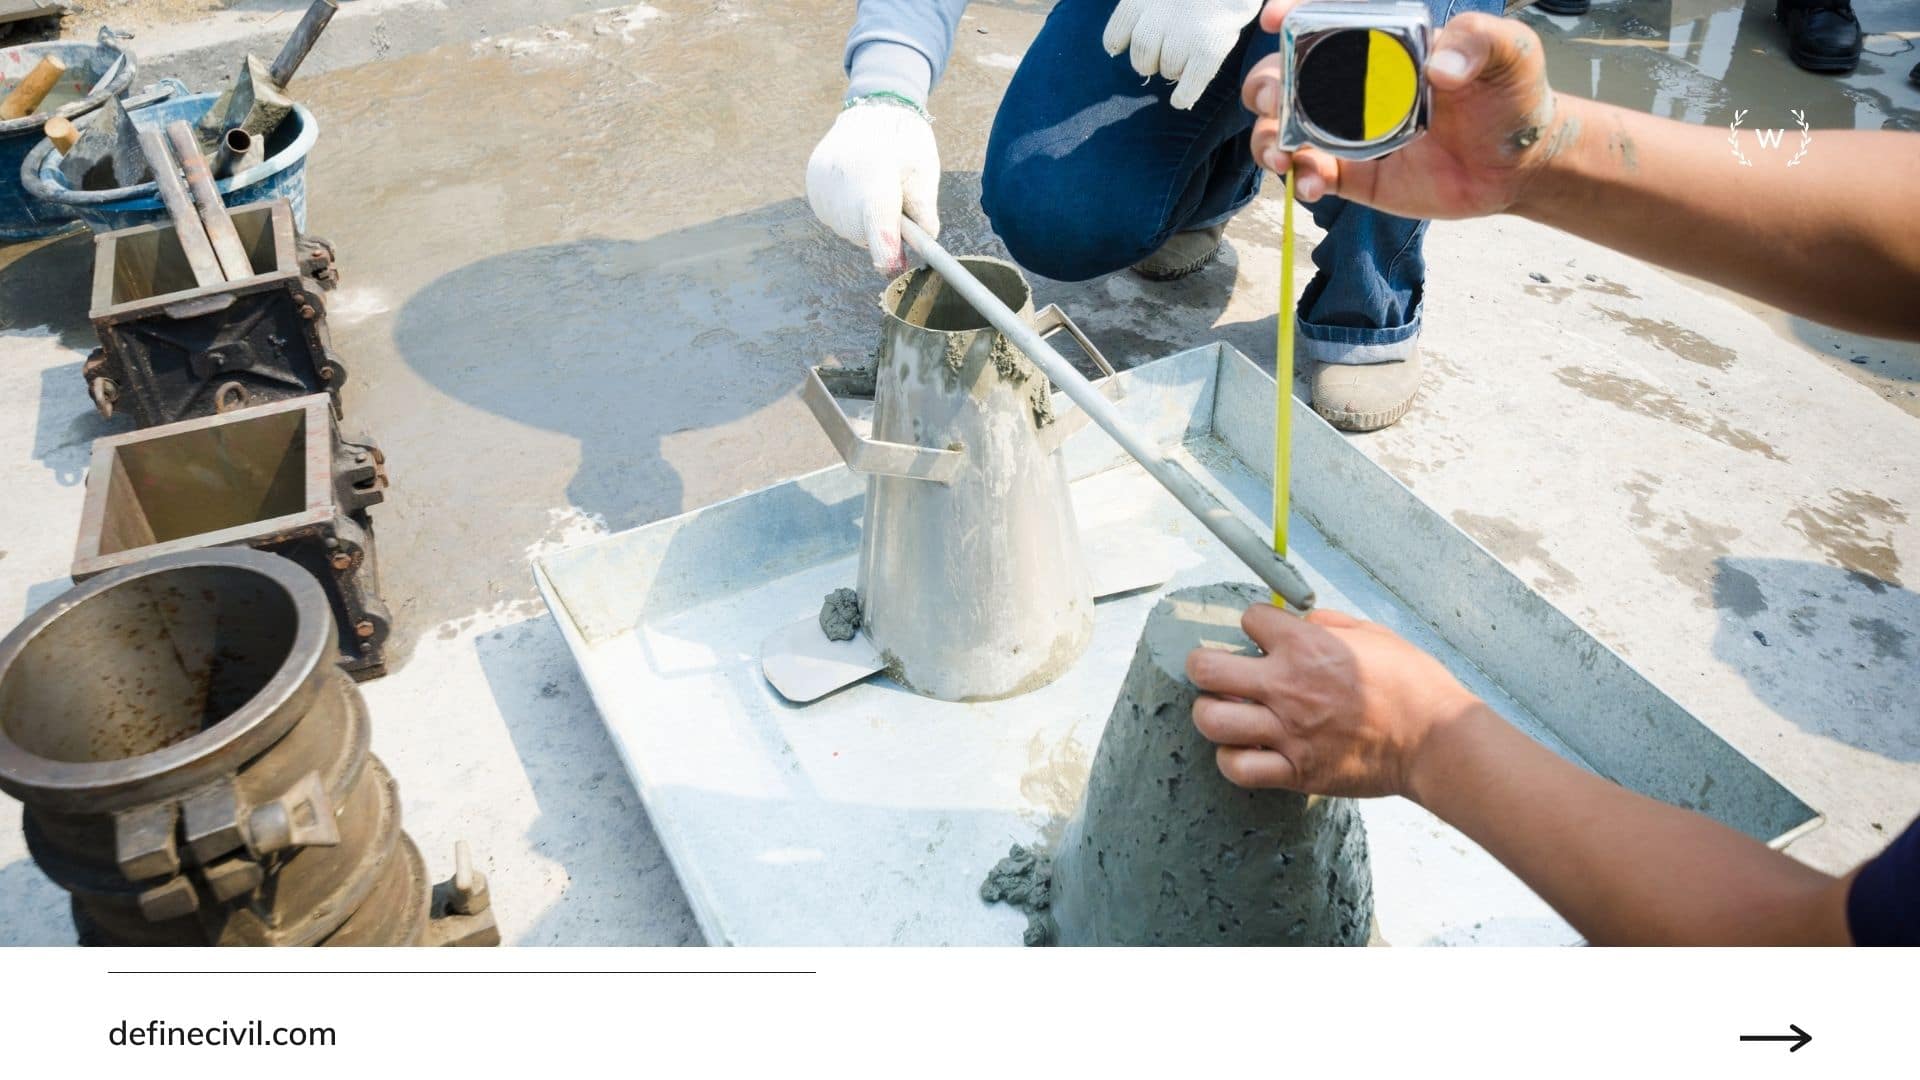
- Now carefully, raise the mold from the concrete in vertical direction.
- The value of slump will be the difference between the height of the mold and that of the specimen freely standing.
[su_service title=”Note this ” icon=”icon: pencil” icon_color=”#227f24″]Please note that you have to perform concrete slump test experiment within a period of 2 minutes after sampling.[/su_service]
Slump value and Results of test
The slump value is the vertical distance measured from the top of the subsided sample and that of the test cone. It is recorded in millimeters. You will mention the value of slump in the laboratory report and mention the shape of the slump as true, zero, collapsed, or shear. These are explained below.
Types of concrete slump
After performing the test, the laboratory person indicates the shape of the slump sample. The shape defines the type of the concrete slump.
- True slump – In most of the cases you will experience a true slump. We call it true slump because it is the only slump you can measure in the field or laboratory. In such, the concrete specimen only settles slightly and bulges out on all the sides. The difference of the sample with that of the cone is the true slump.
- Zero Slump – is zero slump means there no settlement or subsidence of the concrete sample. This shows very hard concrete mix which has very low water cement ratio. These types of concretes are used in road and highway.
[su_box title=”Interesting for you” box_color=”#0092c4″ radius=”9″ id=”social_definecivil”]In rigid pavements we use very low or zero slump concrete when we do it manually without paver. These concretes are very difficult to work with but concrete vibrators are used for compaction.[/su_box]
- Collapsed Slump – A collapsed slump means the concrete just collapses and goes down. This indicates a very high water-cement ratio or the concrete mix is too wet. For such concretes, the slump test is not suitable.
- Shear slump – A shear slump is that in which the concrete sample just slides down on one side while the other side remains intact. This indicates that the sample was not proper. The test is to be repeated.

Self-compacting concrete
For concretes with “very high” workability, the slump test is not recommended. Experts believe that for such you need to use flow test and is more suitable.
Recommended Value of slump
Here’re some recommended values of slumps for various types of construction including reinforced concrete and mass concrete:
[su_table responsive=”yes”]
| Type of Construction | Maximum Slump (mm) | Minimum Slump (mm0 |
| Reinforced foundation walls and footings | 75 | 25 |
| Plain footings, caissons, and substructure walls | 100 | 25 |
| Beams and reinforced walls | 100 | 25 |
| Building columns | 100 | 25 |
| Pavement and slabs | 75 | 25 |
| Mass concrete | 75 | 25 |
[/su_table]
Innovative technologies and further reading
Here’re some innovative technologies for this test. For fast testing, a new apparatus called ‘K-Slump Tester’ is developed. This device can measure slump value within a minute after it is inserted into fresh concrete. And it can also measure relative workability.
I hope you’ve enjoyed the article. But that’s not all, I’ve made a slump test experiment pdf presentation that you can save in your PC or mobile for future reference.
[su_button url=”https://definecivil.com/wp-content/uploads/2021/05/slump-test-experiment-guide-definecivil.pdf” target=”blank” style=”3d” size=”5″ center=”yes” icon=”icon: check”]Download the guide[/su_button]
[su_box title=”Further Recommended Read” box_color=”#0092c4″ radius=”9″ id=”social_definecivil”]
- http://www.columbia.edu/cu/civileng/meyer/publications/publications/2002_09_NYSERDAIII_Appendix_A.pdf
- https://repositories.lib.utexas.edu/bitstream/handle/2152/35335/105-1completed.pdf?sequence=2
- https://www.sciencedirect.com/science/article/pii/B9780080204154500266
[/su_box]
[su_box title=”Further Recommended Read” box_color=”#0092c4″ radius=”9″ id=”social_definecivil”]
[su_posts template=”templates/list-loop.php” tax_term=”3″ order=”desc”]
[/su_box]